Are you a Yamaha golf cart owner who’s ever been stranded on the course?
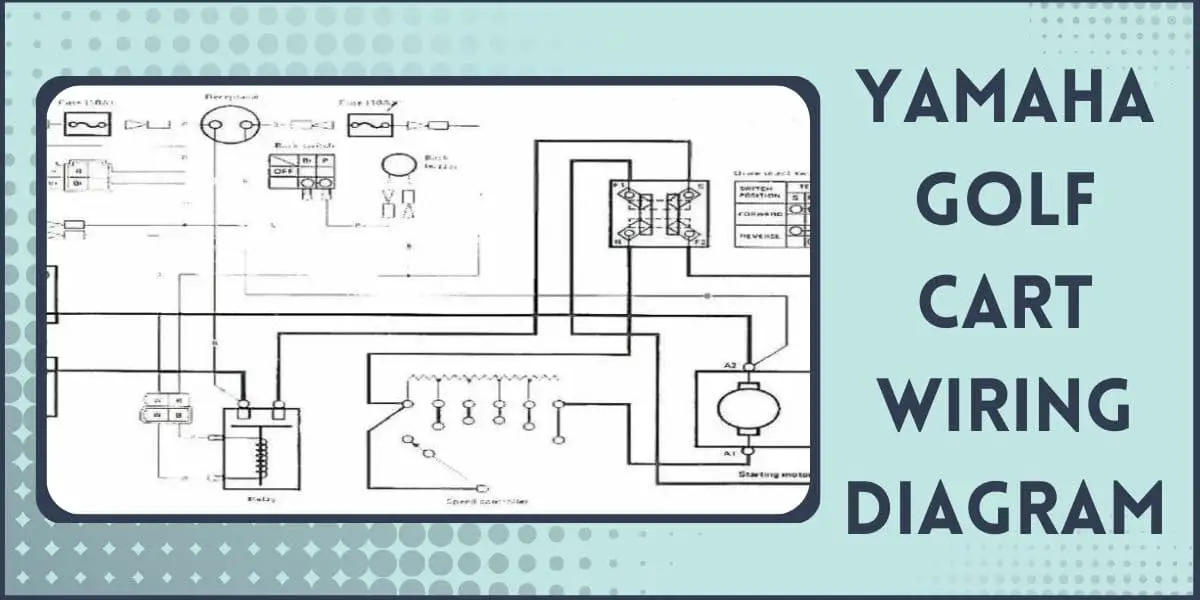
Understanding your Yamaha Golf Cart Wiring Diagram can help you troubleshoot any issues that arise.
In this post, I’ll simplify the basics of Yamaha golf cart wiring diagrams and explain how to use them to your advantage.
Yamaha Golf Cart Wiring Diagram (Gas)
This is the Yamaha Golf Cart Wiring Diagram:
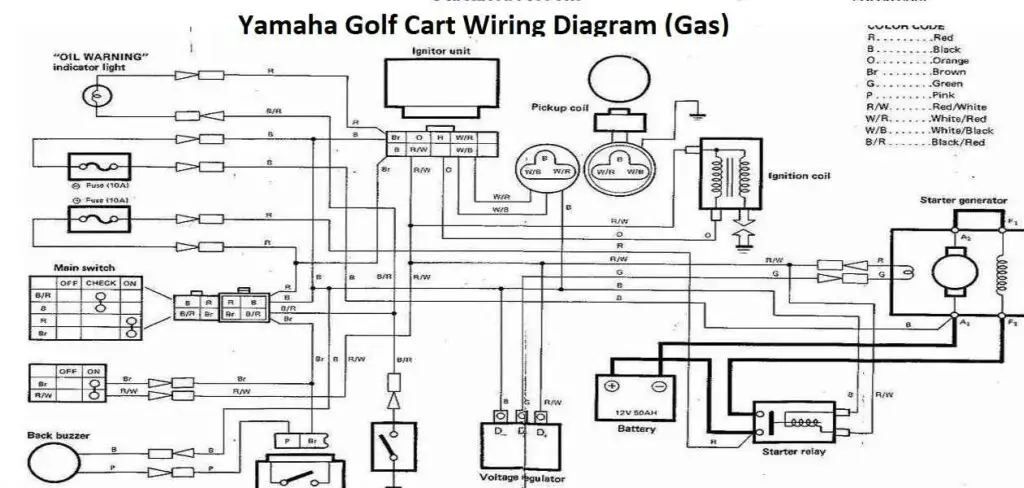
You may also want to check out this Yamaha Golf Cart Starter Generator Wiring Diagram if you have issues starting your vehicle.
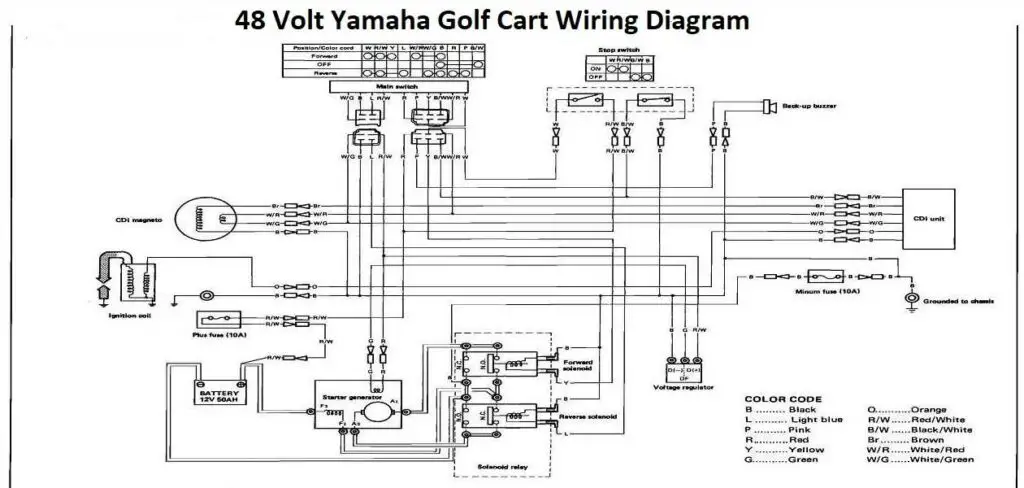
48 Volt Yamaha Golf Cart Wiring Diagram
This is a 48 Volt Yamaha Golf Cart Wiring Diagram:
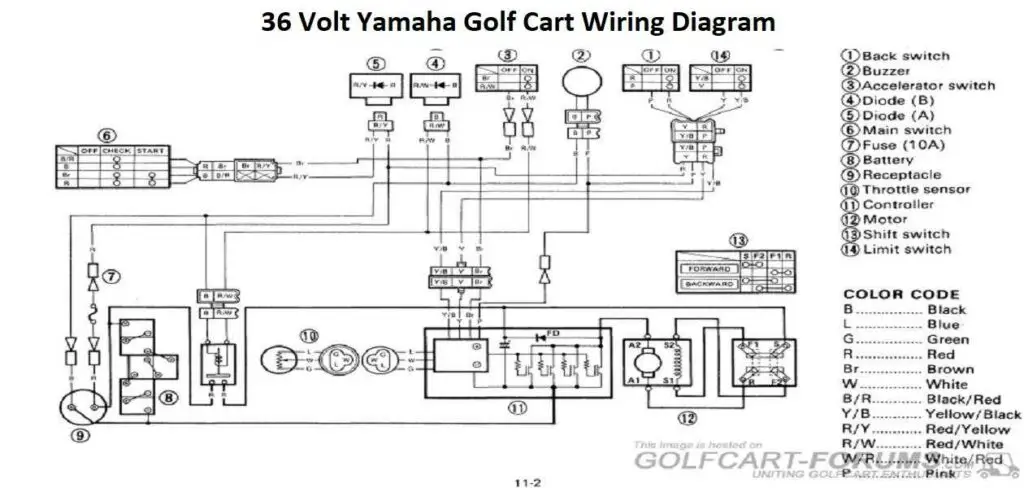
36 Volt Yamaha Golf Cart Wiring Diagram
This is the 36 Volt Yamaha Golf Cart Wiring Diagram:
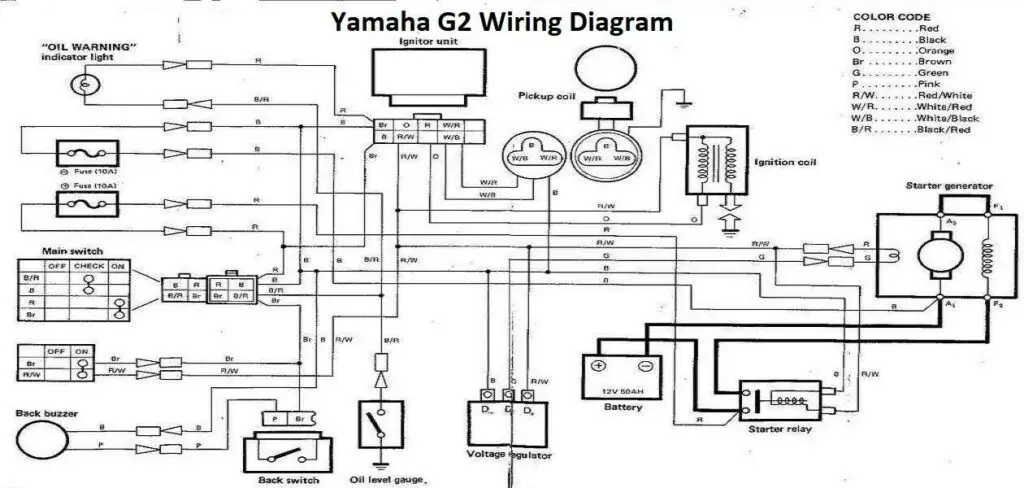
Yamaha G2 Wiring Diagram
This is the Yamaha G2 wiring diagram:
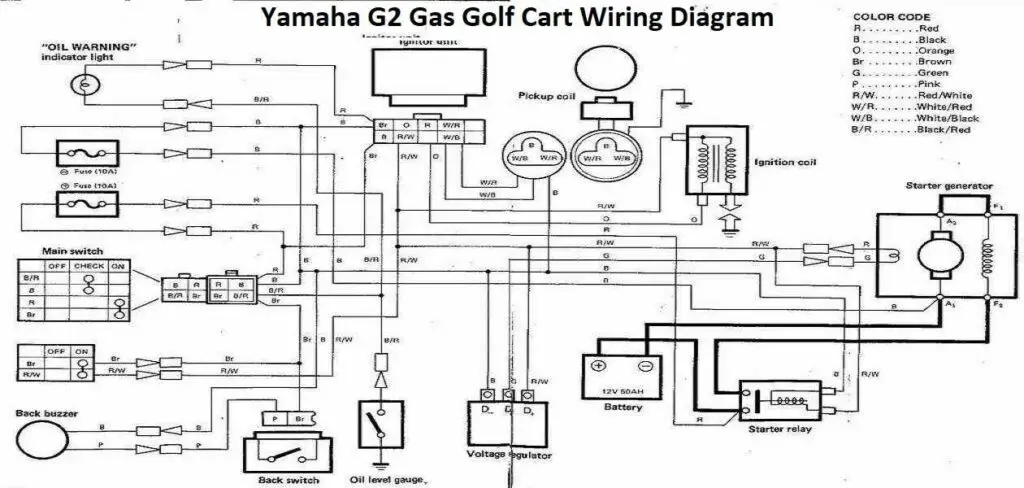
Yamaha G2 Gas Golf Cart Wiring Diagram
This is the Yamaha G2 Gas Golf Cart Wiring Diagram:
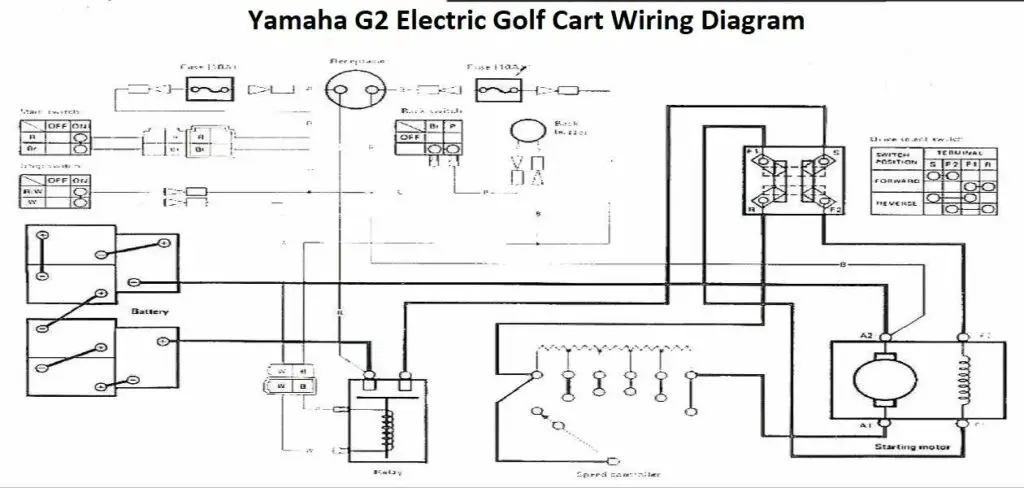
Yamaha G2 Electric Golf Cart Wiring Diagram
This is the Yamaha G2 Electric Golf Cart Wiring Diagram:
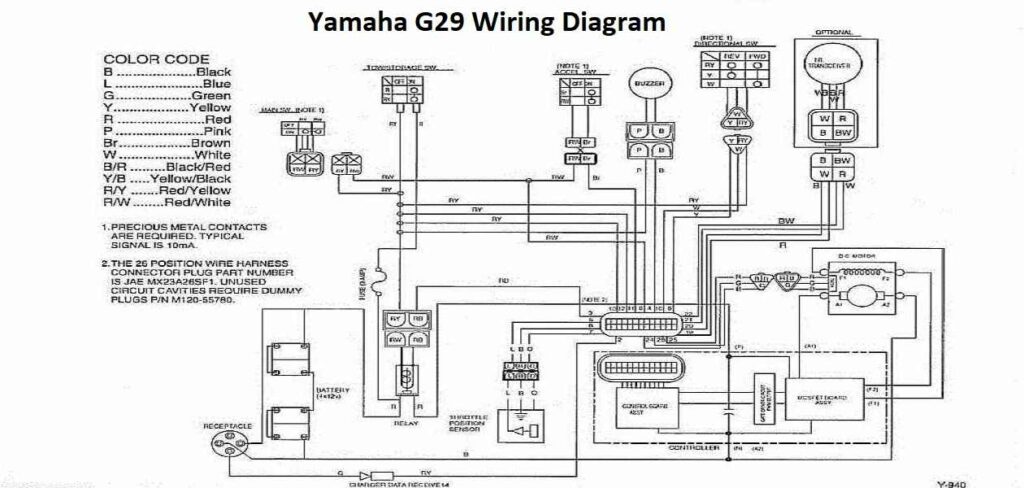
Yamaha G29 Wiring Diagram
This is the Yamaha G29 Wiring Diagram:
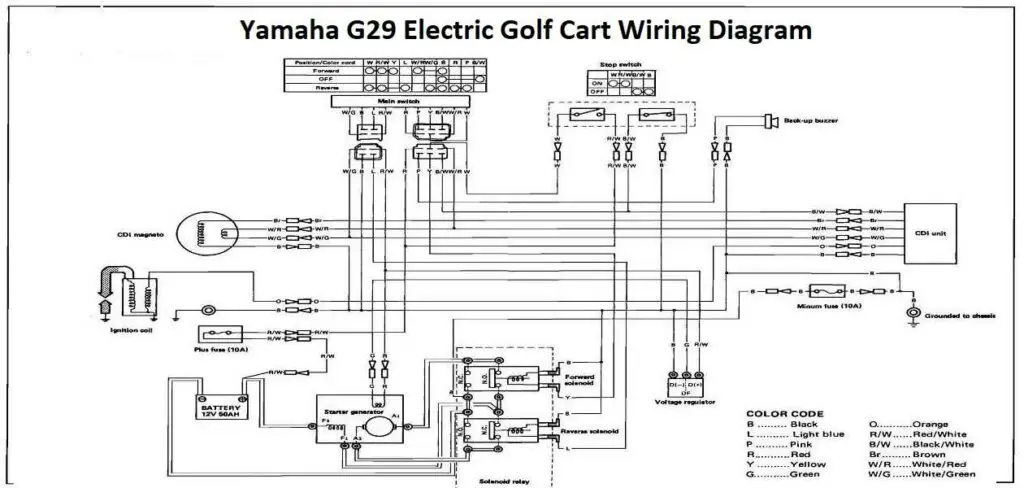
Yamaha G29 Electric Golf Cart Wiring Diagram
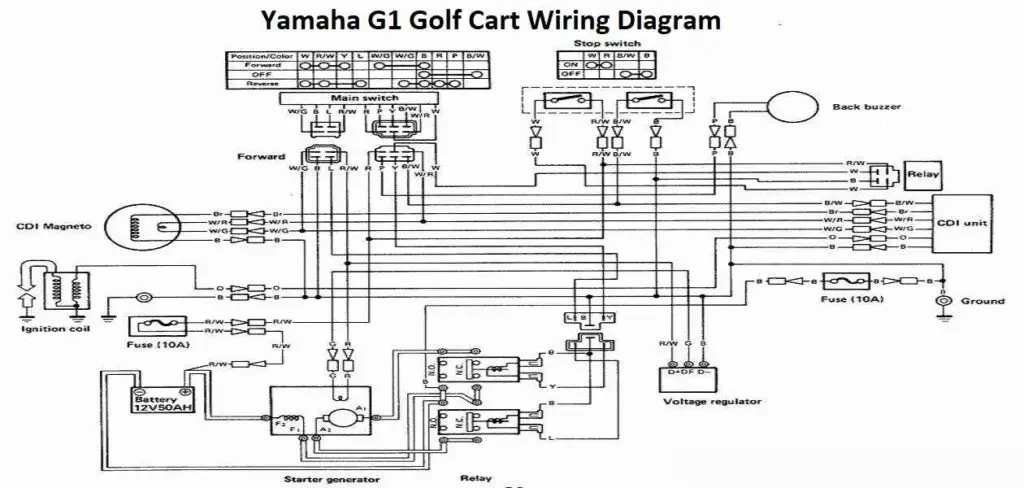
Yamaha G1 Golf Cart Wiring Diagram
This the Yamaha G1 Golf Cart Wiring Diagram:
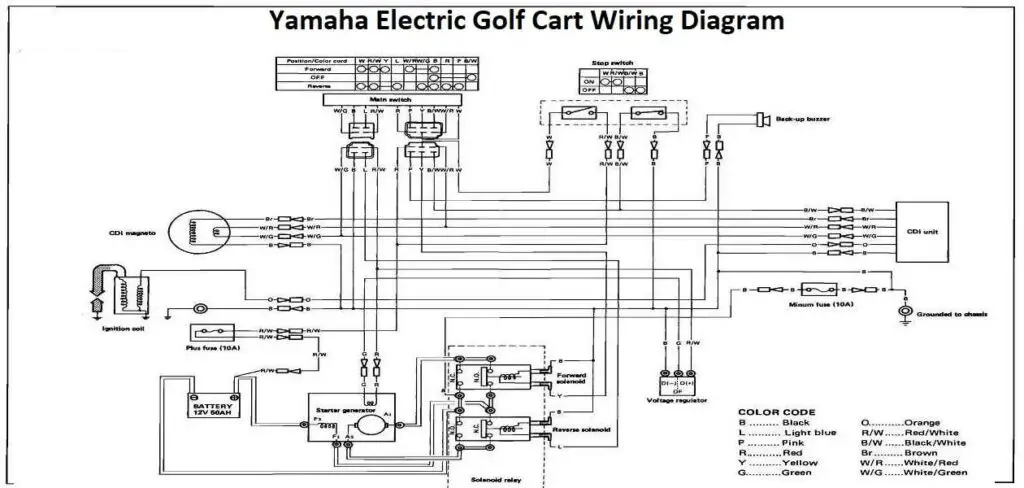
Yamaha Electric Golf Cart Wiring Diagram
This is the Yamaha Electric Golf Cart Wiring Diagram:
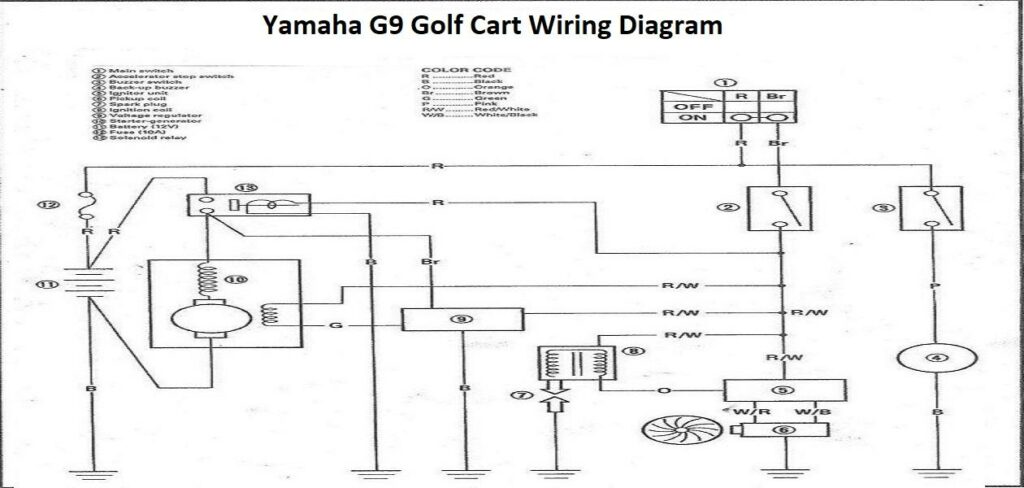
Yamaha G9 Golf Cart Wiring Diagram
This is the Yamaha G9 Golf Cart Wiring Diagram:
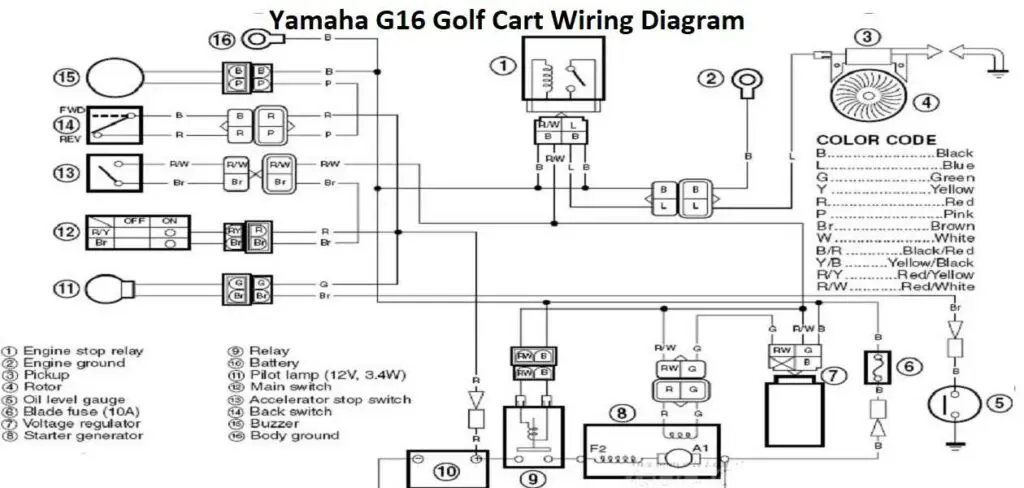
Yamaha G16 Golf Cart Wiring Diagram
This is the Yamaha G16 Golf Cart Wiring Diagram:
If you have battery problems, check out this 48 Volt Golf Cart Battery Wiring Diagram.
How to read a Yamaha golf cart wiring diagram?
Learning how to read a Yamaha golf cart wiring diagram can seem daunting at first, but it’s actually a straightforward process once you understand the basics.
Here are the steps you can follow to read a Yamaha golf cart wiring diagram:
- Understand the symbols: Each symbol on the diagram represents a specific component of the golf cart’s electrical system. Make sure you understand what each symbol means before you begin reading the diagram.
- Identify the power source: The power source is usually located at the top of the diagram and is represented by a battery symbol. Make sure you understand how the power flows through the system from the battery to the different components.
- Follow the wiring: The wiring is usually color-coded and connects the different components of the electrical system. Follow the wiring from the power source to each component, paying close attention to where the wires intersect and connect.
- Use a multimeter: If you’re troubleshooting a specific issue, a multimeter can be a helpful tool to test the voltage and continuity of different wires and components.
- Keep it simple: Don’t get overwhelmed by complex diagrams with lots of symbols and wiring. Focus on one section at a time and break it down into smaller, more manageable pieces.
By following these steps and taking your time, you can become comfortable with reading Yamaha golf cart wiring diagrams and use them to troubleshoot any issues that arise with your golf cart’s electrical system.
How can I troubleshoot Yamaha golf cart wiring issues?
To troubleshoot Yamaha golf cart wiring issues, start by checking the battery and fuses. Test the solenoid and motor using a multimeter. Check for damaged wires or connectors and replace them as necessary.
Do I need any special tools to troubleshoot Yamaha golf cart wiring?
While a multimeter can be a helpful tool for troubleshooting Yamaha golf cart wiring, it’s not strictly necessary. However, having a basic understanding of electrical systems and wiring is important.
Conclusion
In conclusion, a Yamaha golf cart wiring diagram is a crucial tool for understanding the electrical system of your Yamaha golf cart. It displays the various components and how they are connected, providing a visual representation of the wiring system.
This diagram is essential for troubleshooting and repairing any electrical issues in your golf cart. Yamaha provides diagrams for its different models, including the G1, G2, G8, G9, G14, G16, G19, G22, and G29.
These diagrams can be found online or in the owner’s manual of your golf cart. Having a basic understanding of electrical systems and following safety measures when working on your golf cart’s electrical system is essential.
