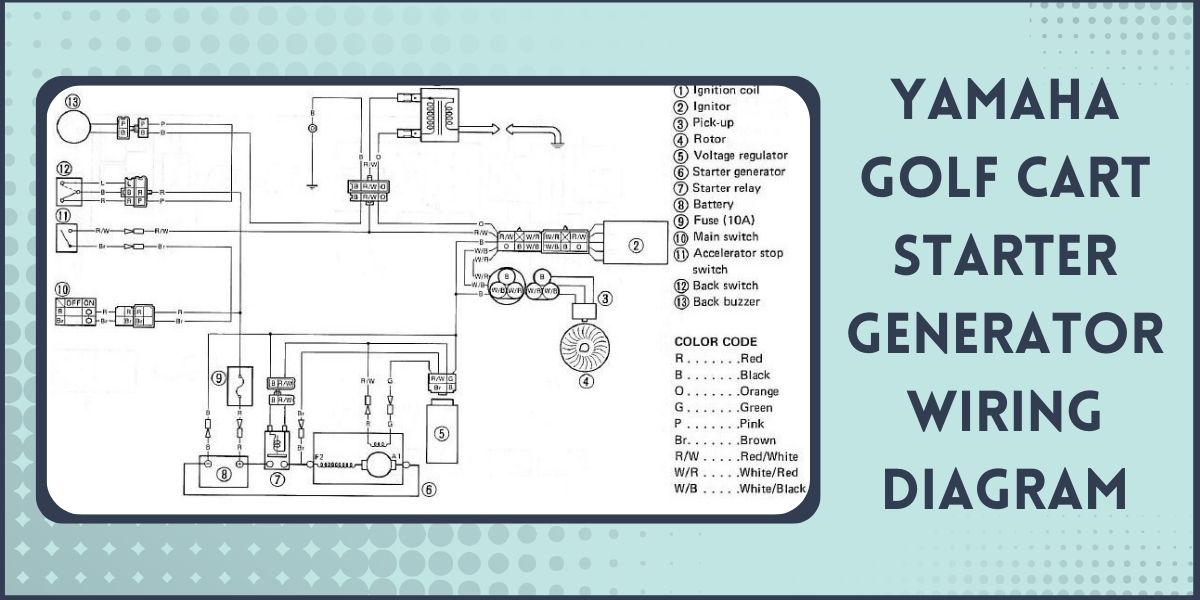
This Yamaha Golf Cart Starter Generator Wiring Diagram shows all the connections on the starter generator.
For anyone looking to install a new or repair their existing Yamaha golf cart starter generator, this diagram will help.
Yamaha Golf Cart Starter Generator Wiring Diagram
This is the Yamaha Golf Cart Starter Generator Wiring Diagram:

If you are having trouble with the solenoid, refer to my dedicated post on Golf Cart Solenoid Wiring Diagram.
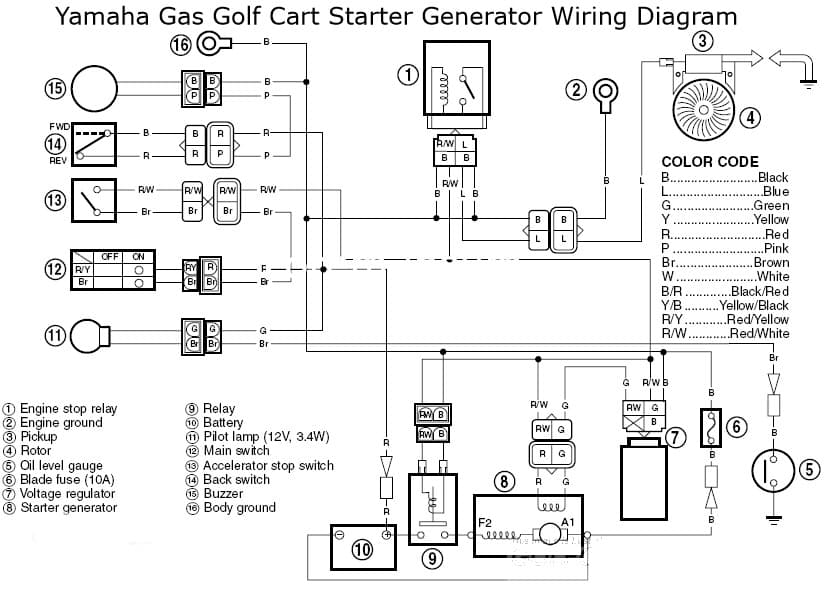
Yamaha Gas Golf Cart Starter Generator Wiring Diagram
This is the Yamaha Gas Golf Cart Starter Generator Wiring Diagram:
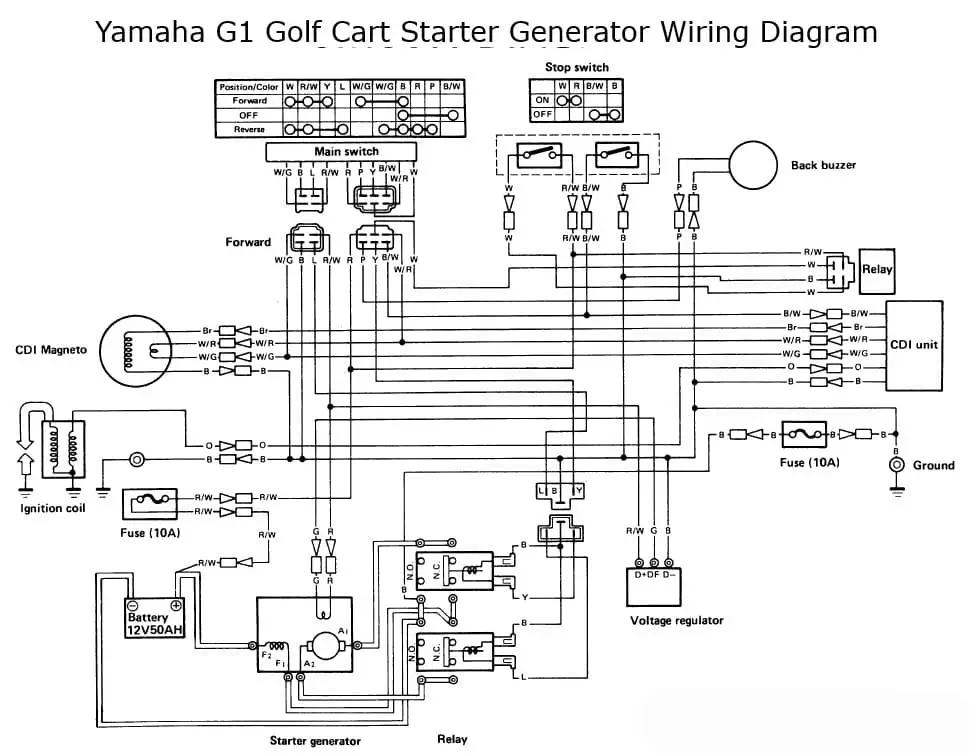
Yamaha G1 Golf Cart Starter Generator Wiring Diagram
This is the Yamaha G1 Golf Cart Starter Generator Wiring Diagram:
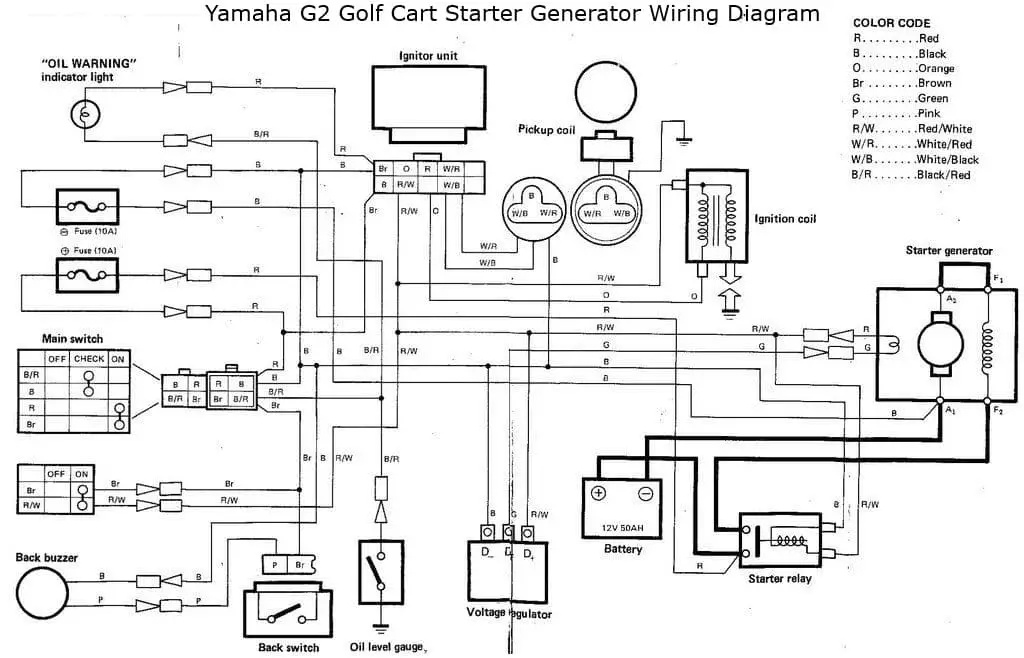
Yamaha G2 Golf Cart Starter Generator Wiring Diagram
This is the Yamaha G2 Golf Cart Starter Generator Wiring Diagram:
How to Test a Starter Generator on A Yamaha Golf Cart?
Follow these steps to test a Starter Generator on A Yamaha Golf Cart:
- Remove all wires on your generator.
- Connect post F2 to the positive terminal and A1 to the negative on your cart battery.
- When activated, the starter should move forward now.
- Your starter should run reverse when you connect A2 to the negative terminal.
- Use a voltmeter to gauge the ohms running through the red and green wires while the starter operates.
- Your voltmeter should be reading five ohms. Else you have a problem.
If you own an EZGo golf cart, check out this article on EZGO TXT Parts Diagram.
How Does a Yamaha Golf Cart Starter Generator Work?
This is how a Yamaha Golf Cart Starter Generator works:
- The battery sends current to the starter generator after switching on your ignition.
- The starter generator ignites and cranks the engine of your golf cart
- The starter generator then supplies current to the golf cart’s accessories and battery for recharging when it spins at over 1200rpm.
How Do You Wire a Yamaha Golf Cart Starter Generator
Follow these steps to wire a Yamaha Golf Cart starter generator:
- Connect the battery’s positive terminal to the input side of the start solenoid.
- The output side of the solenoid should connect with A1.
- Connect A2 to D1.
- Connect D2 to the negative terminal of the battery.
- Observe the direction of rotation of the starter solenoid after energizing it. By doing that, you are testing the rotation direction.
- To ensure it turns in the right direction – do this a few times.
- You’ve got your starter hooked up the right way if it is turning in the right direction.
How to Polarize a Starter Generator on A Golf Cart
While the voltage regulator is ON, touch the battery terminal to the armature terminal. That is all that is required. So, start the engine and see if it’s charging.
Conclusion
I hope that you understand the Yamaha Golf Cart Starter Generator Wiring Diagram completely and will be able to fix issues with its help.
