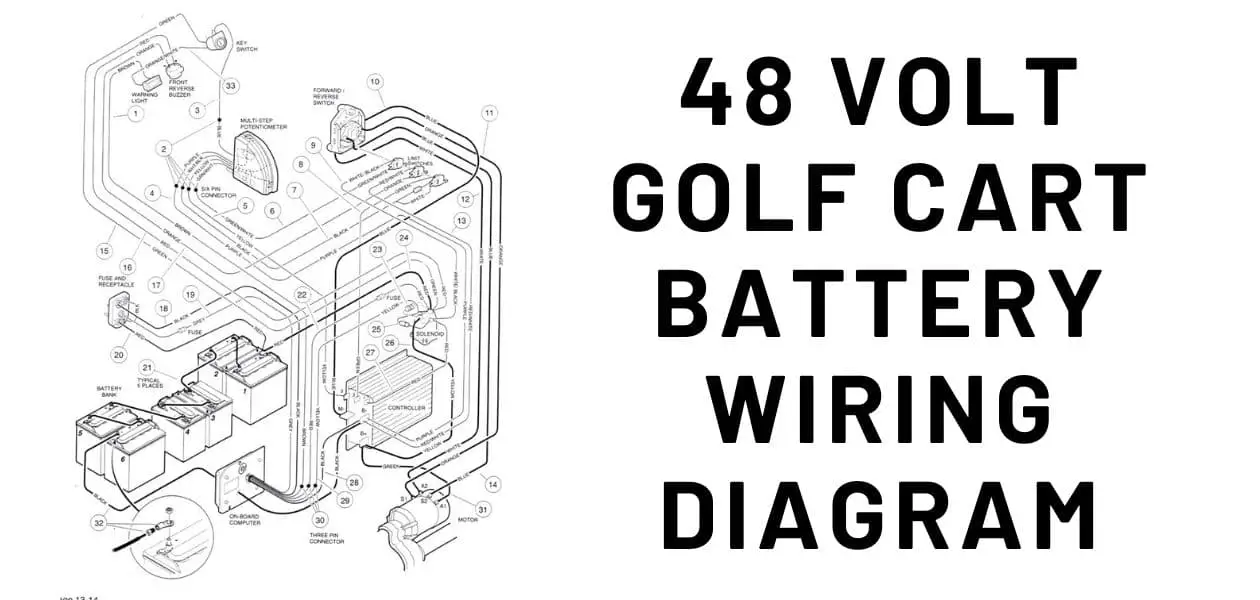
I have been working in the golf cart repair field for several years now, so I have the 48 Volt Golf Cart Wiring Diagram for all the major brands. I found out that a lot of people are looking for these diagrams on the Internet, so I decided to share them here.
In this article, I share the 48 Volt Golf Cart Battery Wiring Diagram and the different components of the battery system for a 48 volt club car, EZ Go golf cart, a Yamaha golf cart, and how they are connected. It can be used as a reference for troubleshooting or repairing a golf cart battery.
48 Volt Golf Cart Battery Wiring Diagram
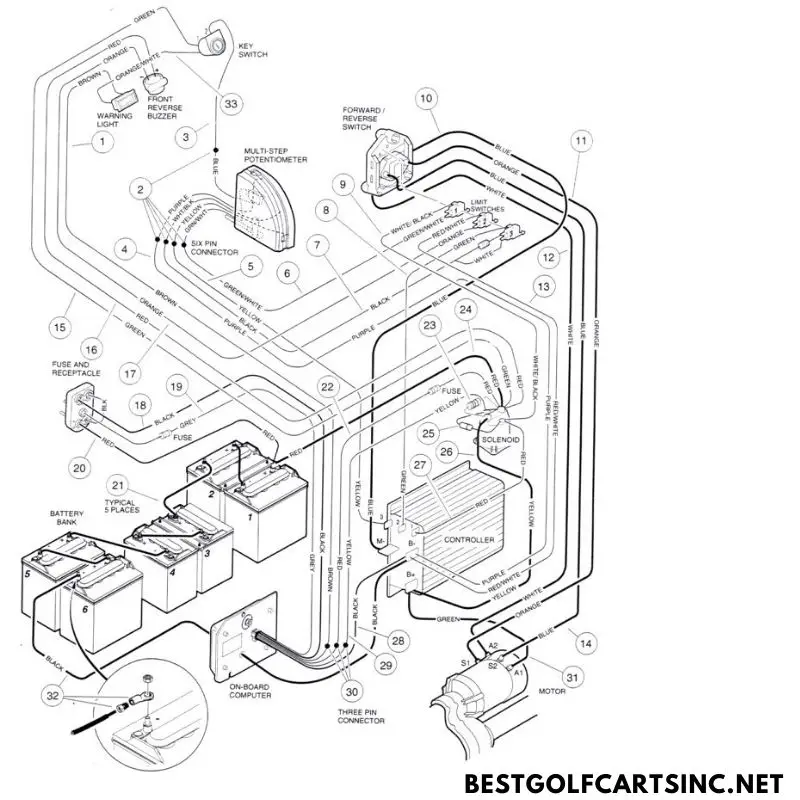
This is the exact 48 Volt Golf Cart Battery Wiring Diagram that you can use to fix or diagnose issues with the battery of your 48v golf cart.
Check out: EZGO Golf Cart Wiring Diagram if you own an EZGO vehicle.
48 Volt Club Car Golf Cart Battery Wiring Diagram
This 48 Volt Club Car Golf Cart Battery Wiring Diagram is a diagram that shows how the overall system works for a 48 volt battery on a Club Car. It can be helpful to have this diagram handy when working on your golf cart. You can also find helpful tips and tricks in our blog section.

When it comes to your Club Car DS, there are a few things you should be aware of before working on the wiring. First of all, the wiring diagram is basically the same for all gas models up until now. If you have a DS electric V-Glide 1995-2002, then you’ll need to use a different circuit, but it will still follow the same basic layout as other models.
Check out this Club Car DS Wiring Diagram, which contains all the years’ diagrams for the Club Car DS golf cart.
Finally, if you’re looking for information on the 10 amp fuse location for Club Car Precedent gas golf carts, we’ve got that, too! Just check out our description section below.
48 Volt Ezgo Golf Cart Battery Wiring Diagram
When it comes to 48 Volt Ezgo Golf Cart Battery Wiring Diagram, the diagram provided below is the most accurate one.
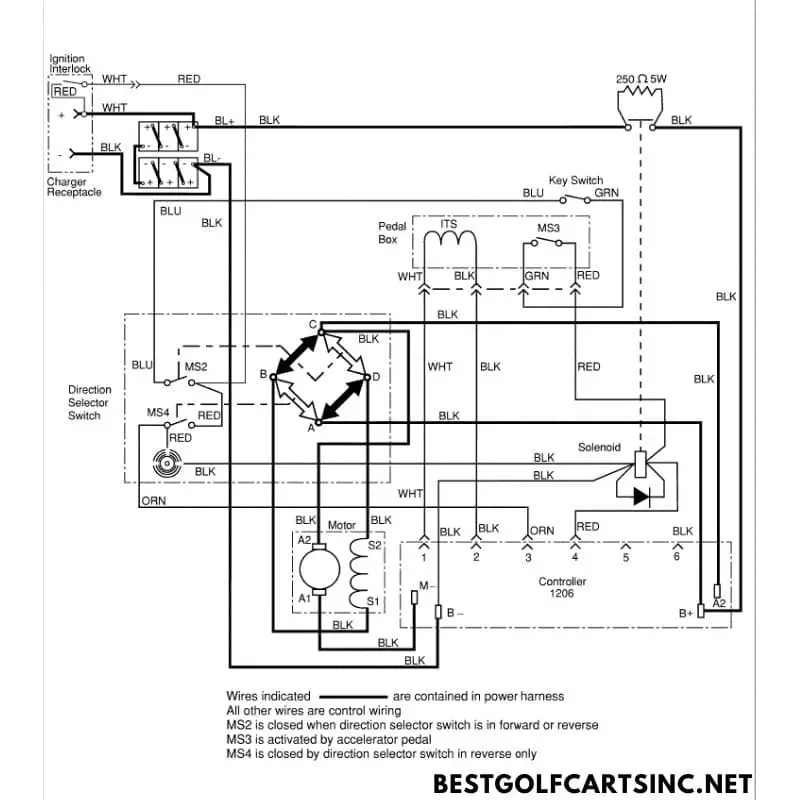
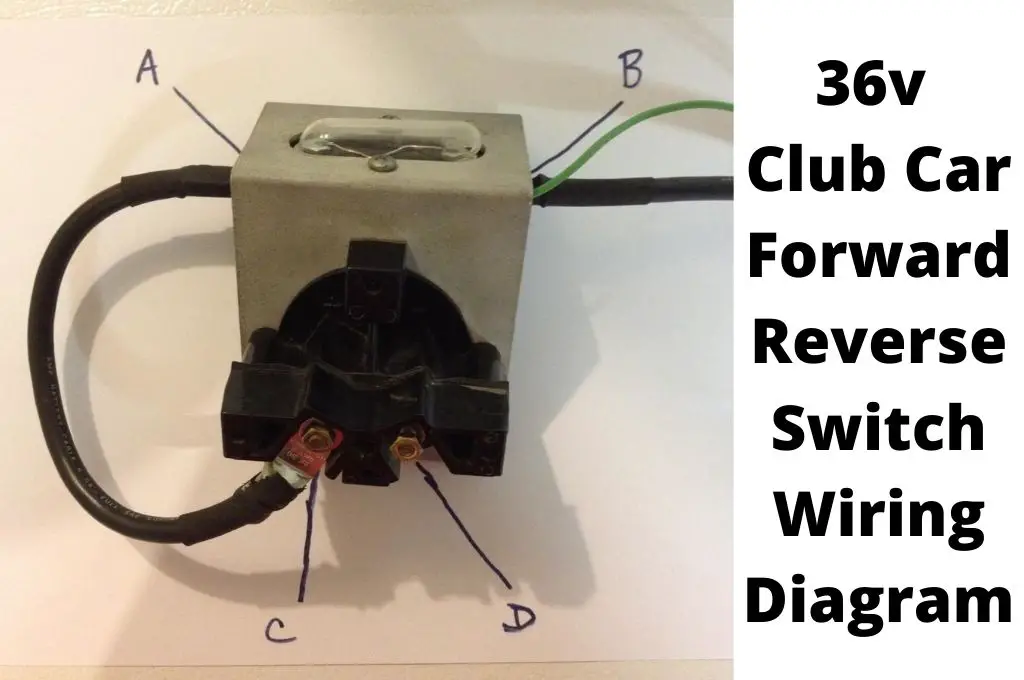
Check out the 36 Volt EZ Go Golf Cart Battery Wiring Diagram if you happen to have a 36 Volt one or to know they both are different.
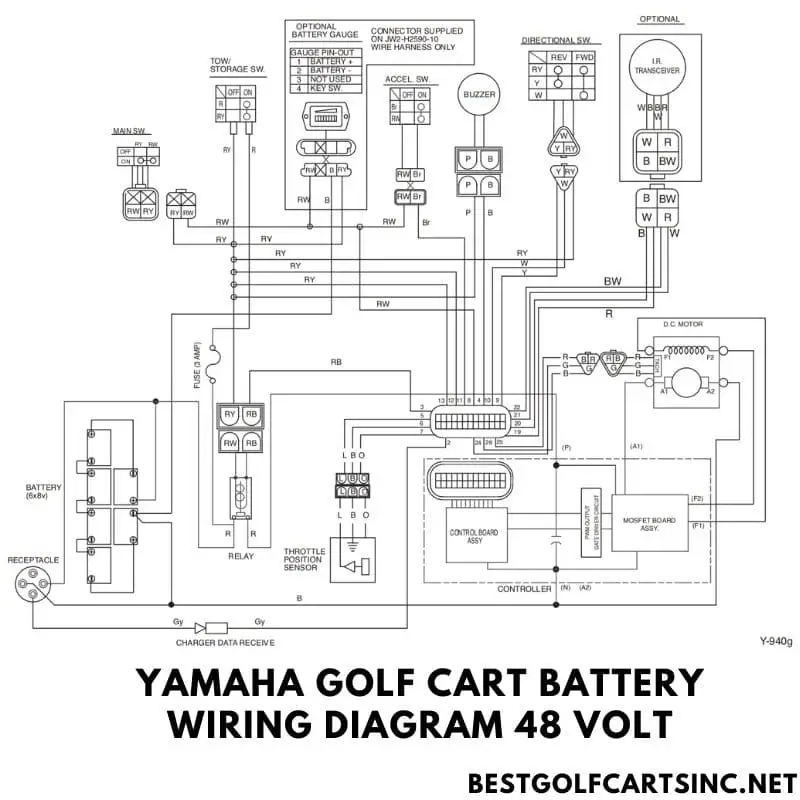
Yamaha Golf Cart Battery Wiring Diagram 48 Volt
The below picture is the Yamaha Golf Cart Battery Wiring Diagram 48 Volt. It shows how the batteries, alternator, and electrical components are connected.
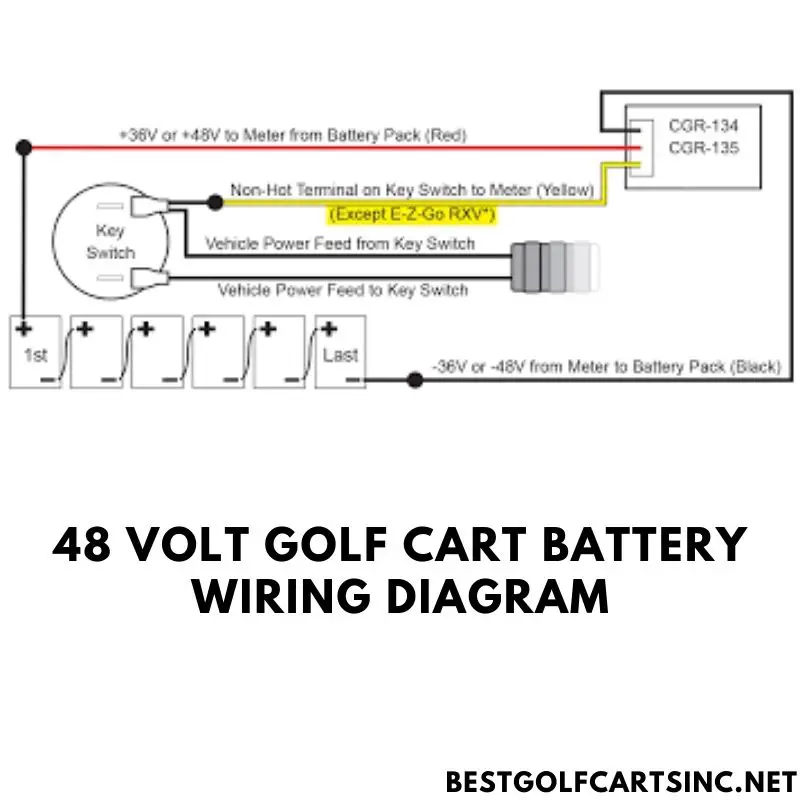
48 Volt Golf Cart Battery Meter Wiring Diagram
This diagram will show the positive and negative terminals of each battery, as well as the location of the meter. You will need to know this information in order to properly connect the meter.
What Is a Golf Cart Battery Wiring Diagram?
A golf cart battery wiring diagram is a diagram that shows how to connect the batteries in a golf cart in series or parallel.
A golf cart battery wiring diagram is a visual representation of the electrical system in an electric vehicle. It shows how the batteries are connected, and it can help you troubleshoot problems with your golf cart.
The diagram will also show you which wires are for the positive and negative terminals on each battery. This information can be helpful if you need to replace a battery or make repairs to the electrical system.
What Are the Components of A Golf Cart Battery Wiring Diagram?
The components of a golf cart battery wiring diagram are the golf cart battery, the golf cart battery charger, and the golf cart battery wiring harness. The golf cart battery wiring harness is the component that connects the golf cart battery to the golf cart battery charger.
When wiring batteries in parallel, it’s important to remember a few key things. First, connect the negative terminals of all the batteries together. Next, connect the positive terminals of all the batteries together. Finally, use a jumper wire to connect the positive terminal of the first battery to the negative terminal of the second battery. This will create one large bank of batteries with double the voltage and amp hours as before.
Remember that when wiring in parallel, you must have enough length on your jumper wire between each set of batteries or you’ll risk reducing their amp capacity. You can also join two sets of batteries together in series to create a single bank of batteries with quadruple the voltage and amp hours as before–just make sure that your charger is compatible with this setup!
How to Read a Golf Cart Battery Wiring Diagram?
There is no one-size-fits-all answer to this question, as the wiring diagram for a golf cart battery may vary depending on the make and model of the cart. However, some tips on how to read a golf cart battery wiring diagram include understanding the symbols used on the diagram and being aware of the different types of wiring systems used in golf carts.
Why Do You Need a Golf Cart Battery Wiring Diagram?
A golf cart battery wiring diagram can be helpful in determining if there is a problem with your golf cart.
What Do the Different Symbols in A Golf Cart Battery Wiring Diagram Mean?
The different symbols in a golf cart battery wiring diagram mean the following:
- The circle with a cross in it is the negative terminal.
- The plus sign is the positive terminal.
- The straight line is the ground.
- The wavy line is the electrical current.
- The most important symbols are shown below.
- It typically contains six 12-volt batteries connected in series to provide 48 volts.
- It manages all of the systems on the cart, including the motor and brake systems.
- Motor: This symbol represents the electric motor that powers the golf cart.
How to Wire a 48 Volt Golf Cart Battery System?
There are a few things you need to know before wiring a 48 volt golf cart battery system. First, you need to know the voltage of your batteries and the amperage of your charger. Next, you need to know how to properly connect the batteries and the charger. Finally, you need to know how to safely connect the system to your golf cart.
When wiring a 48 volt golf cart battery system, it is important to follow the correct instructions. This will ensure that your system is safe and properly functioning. Here are some steps to help you get started:
- Always attach your ground wire to the frame, negative post on your solenoid, or the negative post of a 12 Volt battery.
- For gas and electric golf carts with 48 volts, always connect your ground wire to either the frame or the negative terminal on their controller.
- A voltage reducer (VOLT-2000) is required for 48 volt electric Club Car, EZGO, and Yamaha golf carts.
- Some newer carts have a 4 battery configuration allowing the user to control one of those in series; whereas others require the installation of a VOLT-2000.
- This battery system should be wired with a 12-gauge wire and fuses. It is typically used to power electric vehicles with an engine under 250 watts of power or less.
- The 48 volt golf cart battery system is similar to the ones used in EV vehicles, but it typically has more power and uses less energy.
How to Determine if Your Wiring Is Correct?
In order to determine if your wiring is correct, check the resistance of the coil of the main solenoid. The resistance value should be at least 100 Ohms.
If everything looks good so far, you can then attach jumpers to the main battery’s positive and negative terminals. When you do this, you should see the reading rise to infinity and then dip below 0.3 Ohms. As long as the non-banded side of the solenoid is connected to Pin 12 on the controller, where a white band is present, you’re good to go!
The golf cart’s original controller comes with a setting for 36-volt solenoids, but if you’re using the same controller, you’ll need to reconfigure it for 46-volt solenoids. If this is what you want to do, make sure that you turn off the 36-volt setting and then change it to 46 volts.
Conclusion
In conclusion, to make your life easier, you should check out the 48 Volt Golf Cart Battery Wiring Diagram, especially if you are having issues with your golf cart battery. You will need a 48 Volt Golf Cart Battery Wiring Diagram to help you identify the different components of the golf cart battery system and to help you find out the type of battery you need to purchase. We have tried to cover the wiring diagrams of the 48v Club Car and all the major brands like EZ GO, Yamaha, etc in this article.
