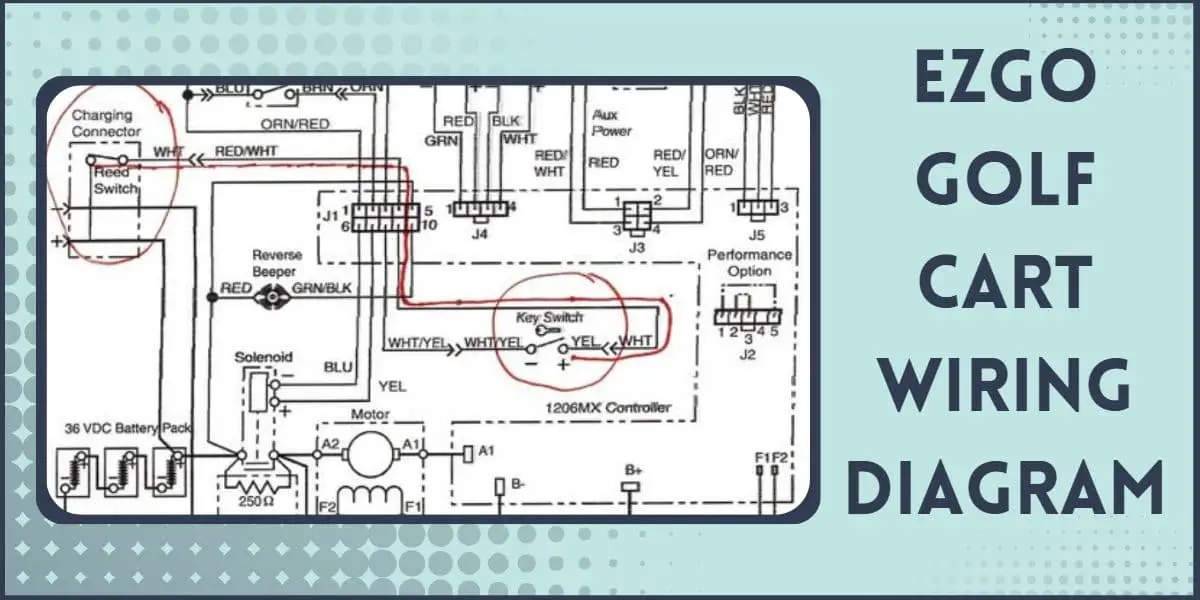
If you want to get the most out of your EZGO vehicle or repair it yourself, you will need an EZGO Golf Cart Wiring Diagram and understand it.
In this article, I have mentioned EZGO Golf Cart Wiring Diagram for EZGO golf cart models like TXT, RXV, Marathon, PDS, and DCS for all gas & electric variants.
EZGO Golf Cart Wiring Diagram
This is the EZGO Golf Cart Wiring Diagram:
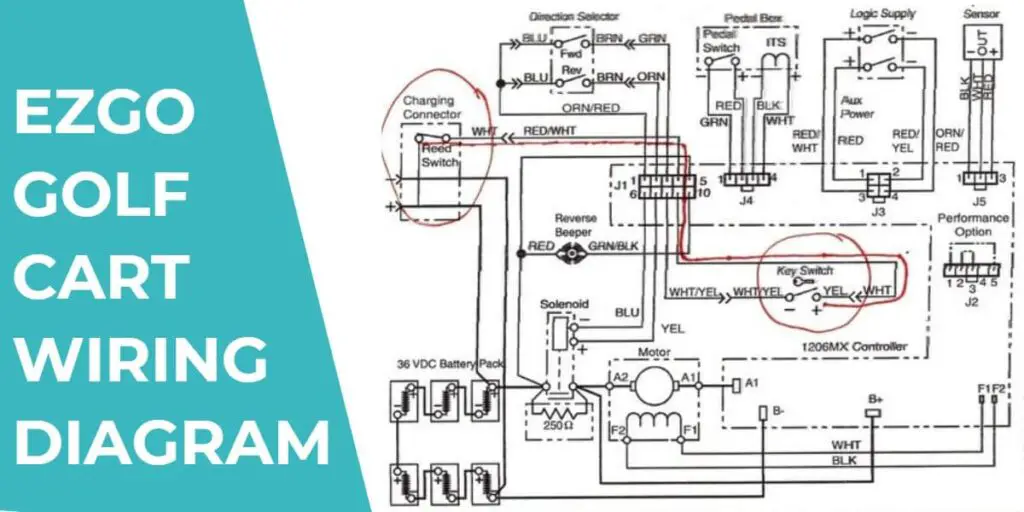
Note: To use the EZGO Golf Cart Wiring Diagram, you will need to first determine which wires are going to your golf cart and which wires are going to your battery. Once you have determined this, follow the diagram to find the correct connections.
EZGO Electric Golf Cart Wiring Diagram

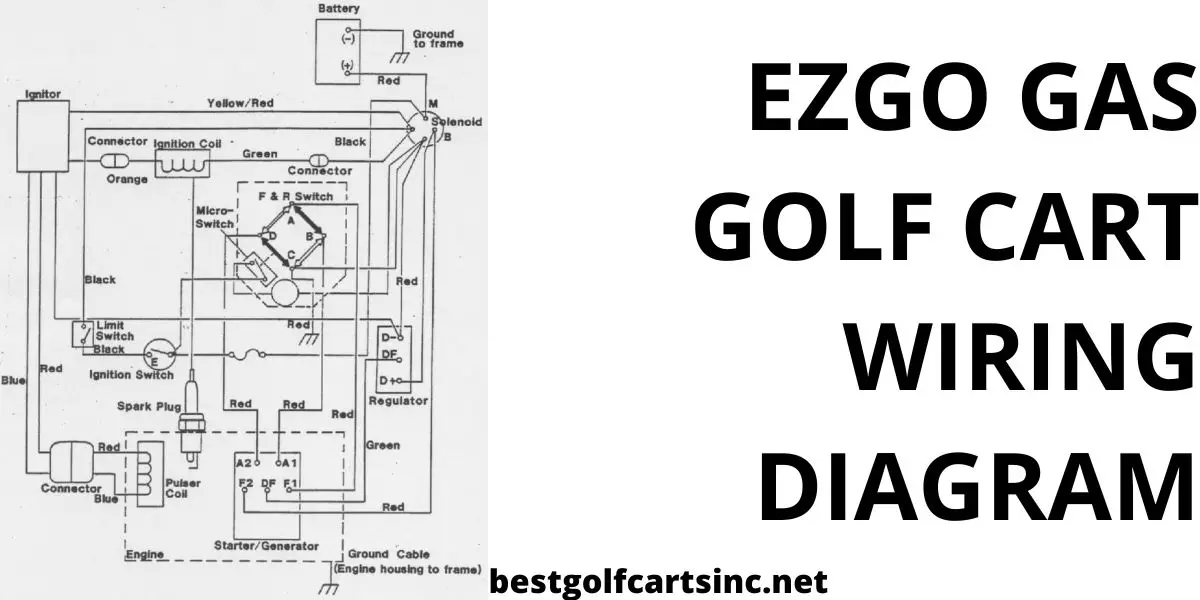
EZGO Gas Golf Cart Wiring Diagram
This is the EZGO Gas Golf Cart Wiring Diagram:
EZ GO Golf Cart Wiring Diagram Pdf
Download the below EZ GO Golf Cart Wiring Diagram PDF to know everything about the vehicle.
Check out the 36 Volt EZ Go Golf Cart Battery Wiring Diagram, if you own a 36v EZGO.
EZGO TXT Wiring Diagram
Check out this EZGO TXT Wiring Diagram for all golf cart owners that have an EZGO TXT:

EZGO RXV Wiring Diagram
This is the EZGO RXV wiring diagram for the years before 2009:
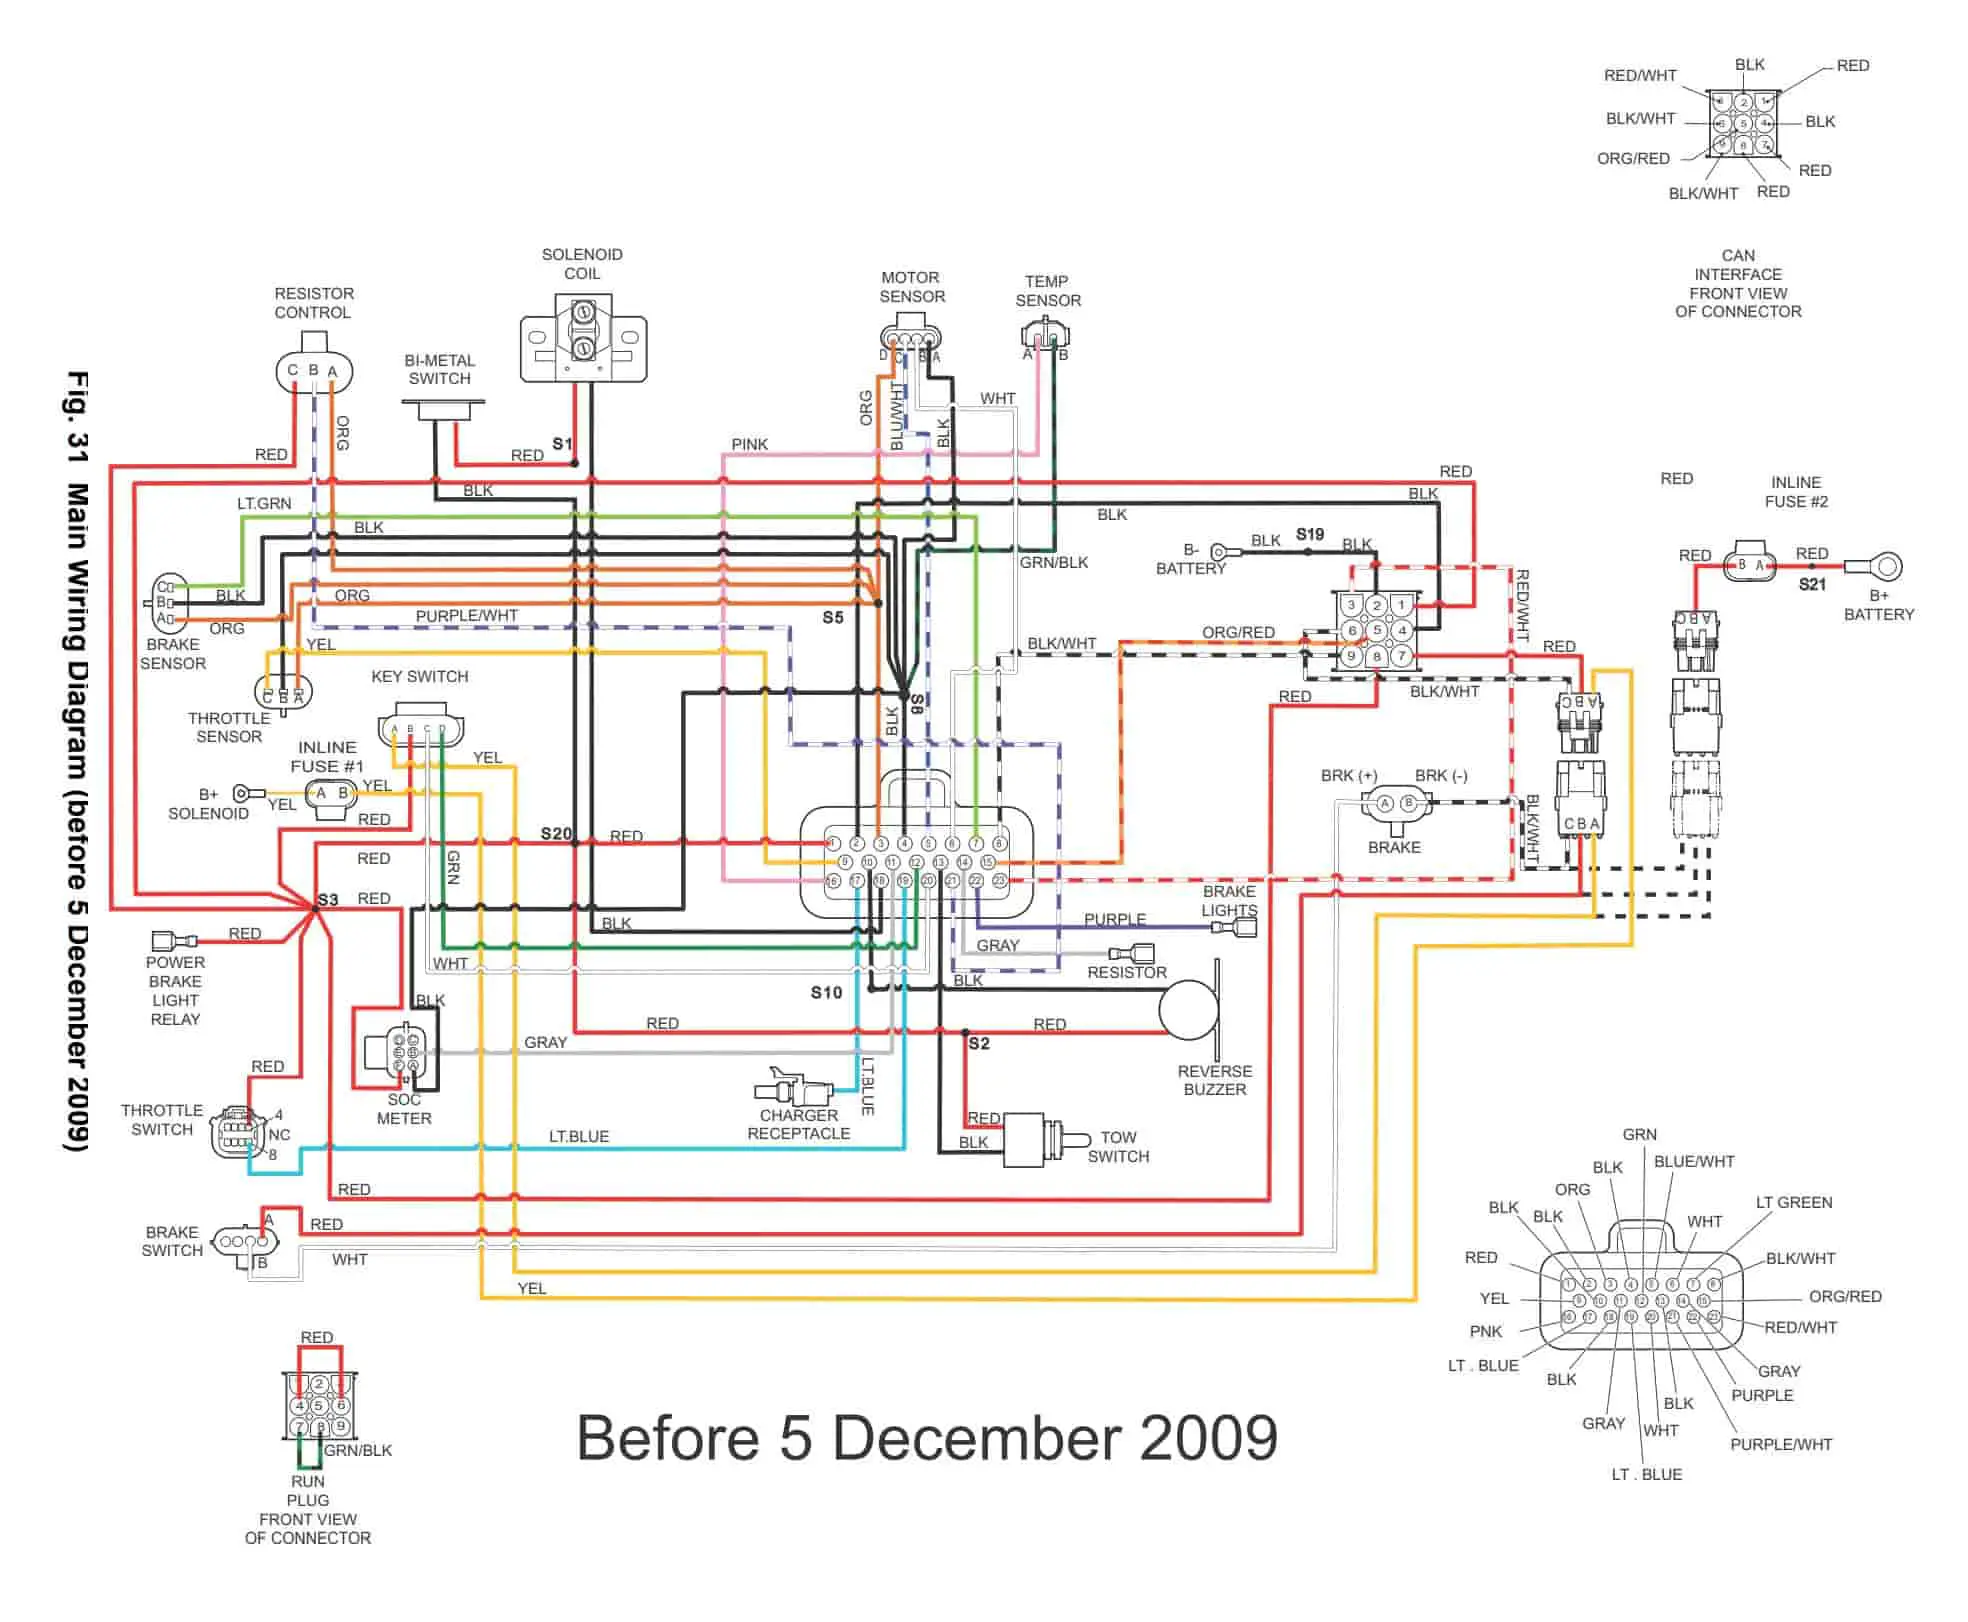
For 2009 & above years, this is the EZGO RXV wiring diagram:
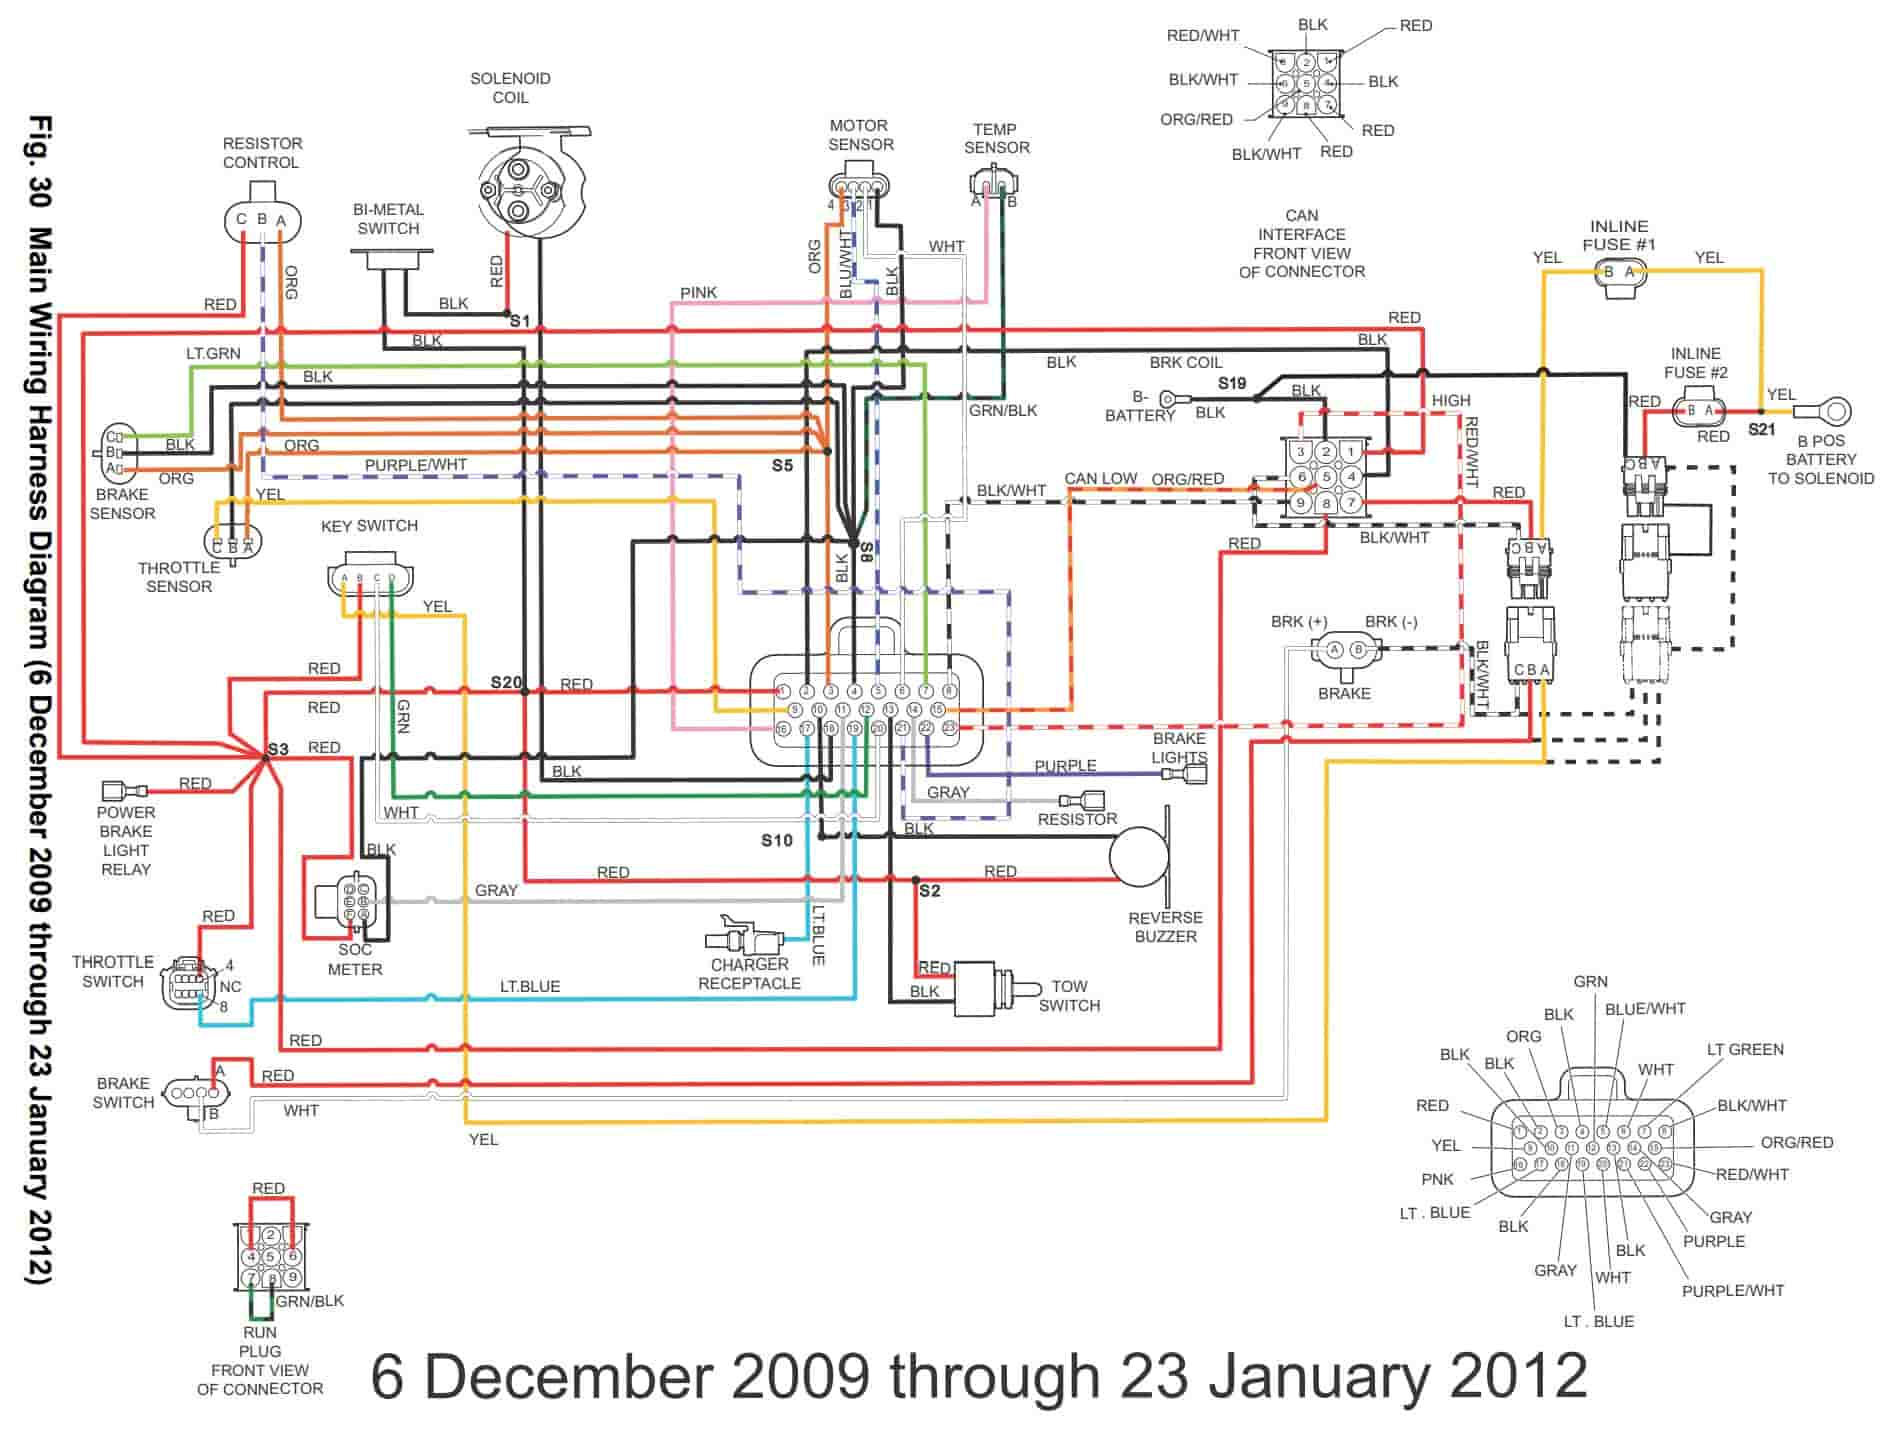
For 2012 & above years, this is the EZGO RXV 48 volt wiring diagram:

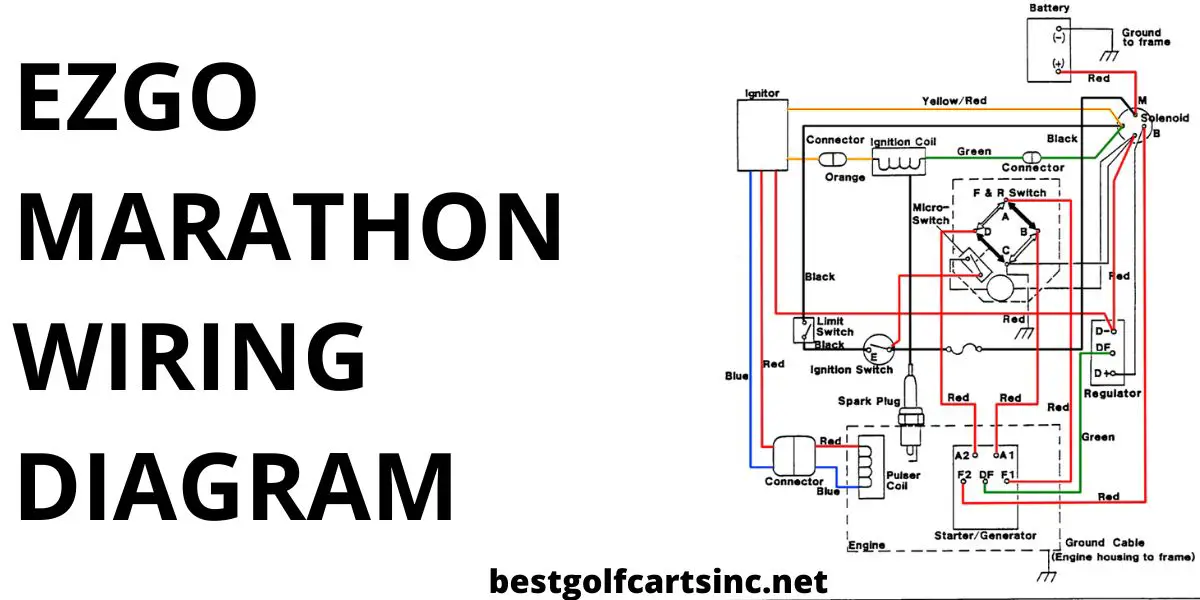
EZGO Marathon Wiring Diagram
If you own an EZGO Marathon, check this wiring diagram:
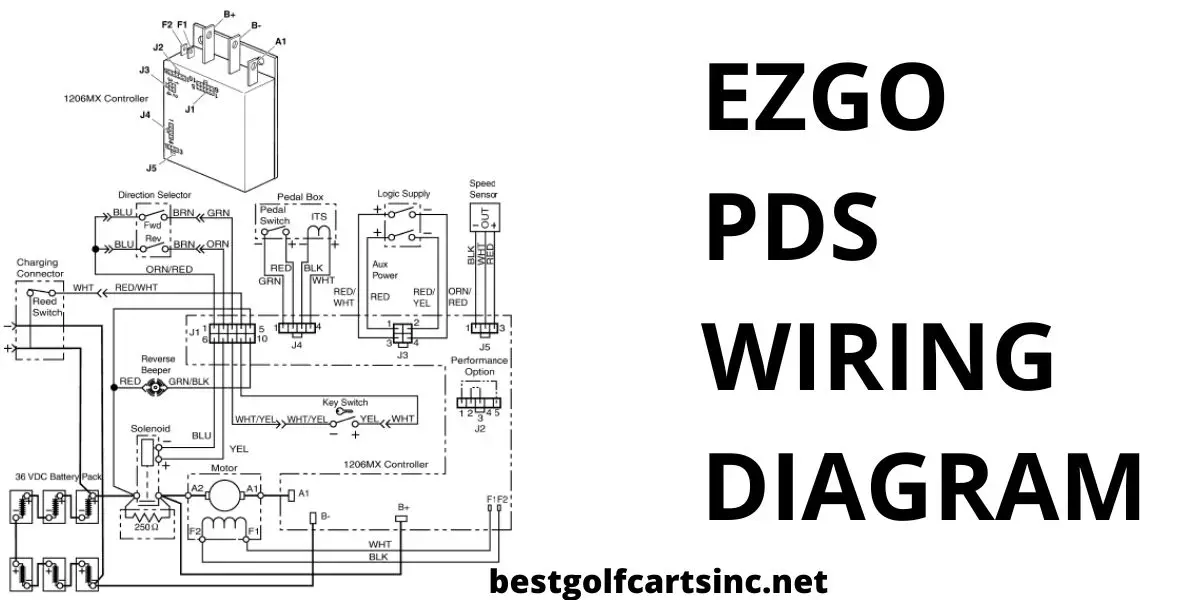
EZGO PDS Wiring Diagram
For people who own the EZGO PDS model, check this EZGO PDS Wiring Diagram:
EZGO DCS Wiring Diagram
This is the wiring diagram for EZGO DCS golf cart:

EZGO 2 Cycle Engine Diagram

EZGO 4 Cycle Engine Diagram

How to Wire an Ezgo Electric Golf Cart?
If you want to learn how to wire an ezgo electric golf cart, then follow these steps:
- Get yourself an exact EZGO Golf Cart Wiring Diagram from the ones mentioned above according to your model. The diagram will help you with what wires to use and where to connect them.
- Once you have read through the manual, it’s time to start working on your project by removing the battery cover.
- Disconnect the negative terminal from the positive terminal and take the battery out.
- After removing the battery, you need to look inside the chassis for the positive terminal and the ground connection.
- Make sure that they are connected to the frame.
- You also need to look for the neutral and the ground terminals that are located near the front of the motor.
- Look at the connector that connects the power supply to the starter. It should be connected to the ground.
- Next, you need to take the positive terminal and the ground terminal and connect them to the battery and the frame respectively.
- After connecting the positive terminal, you need to turn on the ignition key. After that, plug in the battery and make sure it’s connected properly.
- After all these connections, you need to start the motor. Now, your golf cart is ready to go! The EZGO is powered by a 12V DC motor. It can move at speeds up to 15mph. The maximum distance of travel is approximately 20 miles.
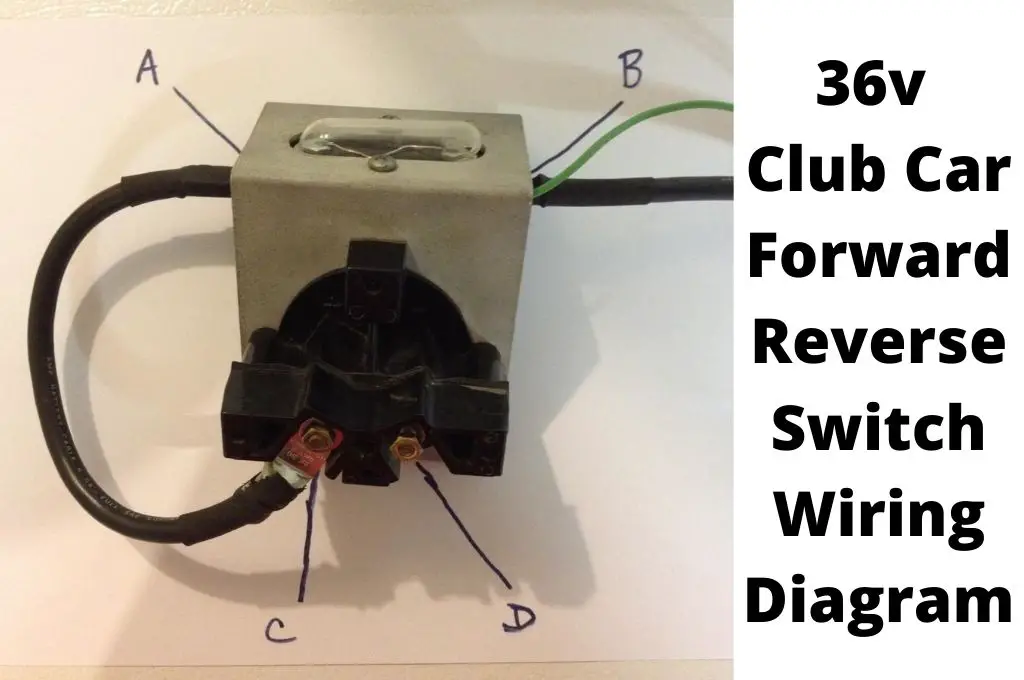
Related: 36 Volt Ezgo Forward Reverse Switch Wiring Diagram.
Conclusion
The EZGO golf cart wiring diagram can help you connect your golf cart to the electrical system. The diagram includes the battery, motor, and controller.
I hope the above EZGO Golf Cart Wiring Diagram helped you solve issues with your EZ Go vehicle.
