I remember the first time I had to deal with the wiring of my golf cart from EZGO, I was nervously fumbling with wires, praying I wouldn’t damage the solenoid.
Being a serial engineer, I quickly learned how to work through the diagram.
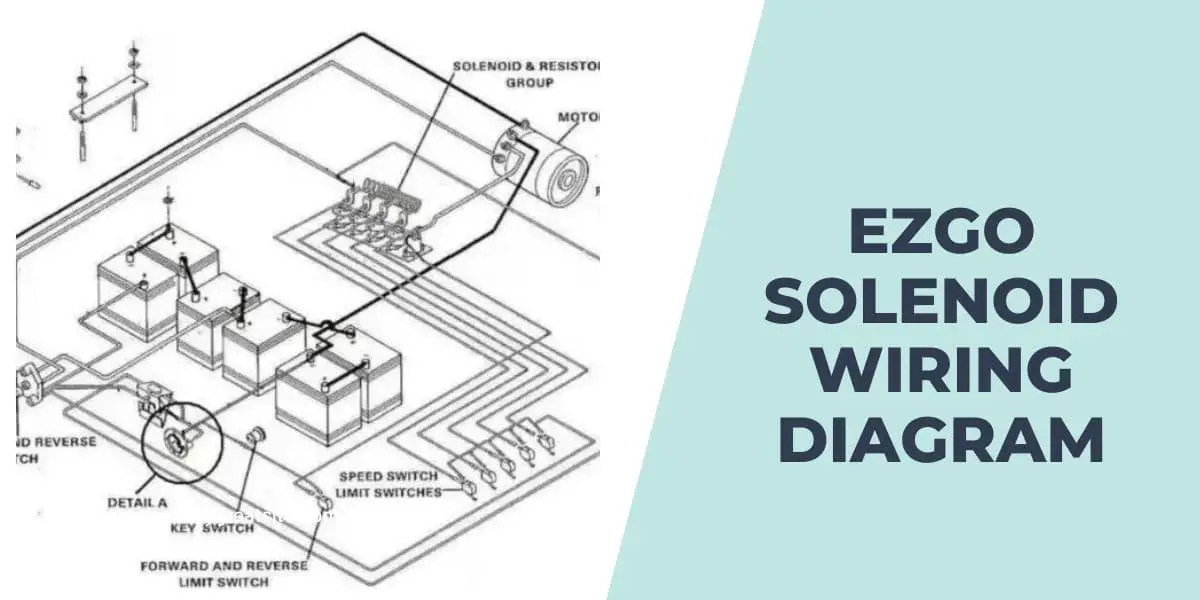
In this blog post, I’ll explain the EZGO Solenoid Wiring Diagram that’ll make your EZGO solenoid installation a breeze.
EZGO Solenoid Wiring Diagram
This is the EZGO solenoid wiring diagram:
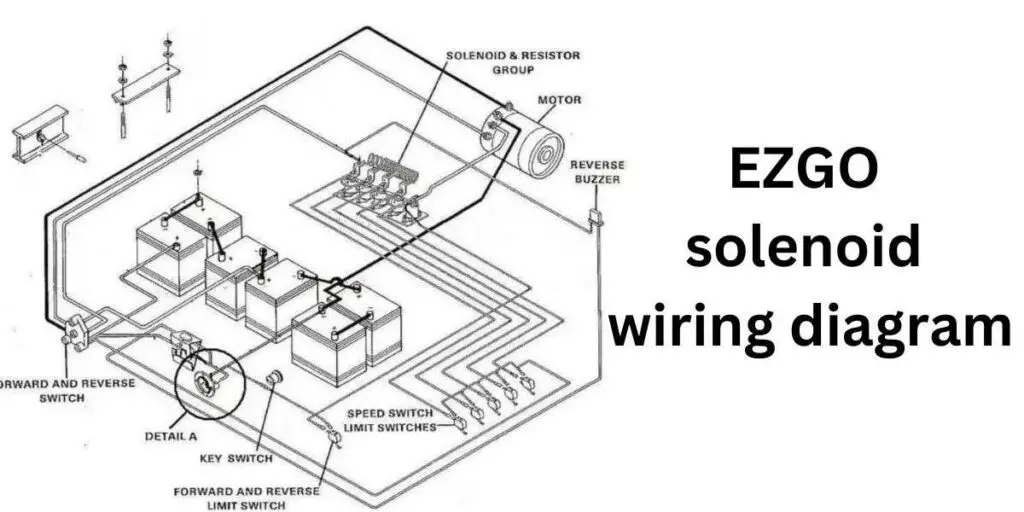
How to Wire EZGO Solenoid on a Golf Cart
Follow these steps to wire EZGO Solenoid on a golf cart:
- Locate your solenoid: You’ll find it under the seat of your golf cart, usually mounted near the speed controller.
- Identify the terminals: The 4-terminal solenoid will have two large terminals (usually marked A and B) and two small terminals (marked S1 and S2).
- Connect the battery: Attach a wire from the positive terminal of the battery to terminal A on the solenoid.
- Connect the controller: Attach a wire from terminal B on the solenoid to the B+ terminal on the speed controller.
- Connect the key switch: Attach a wire from the S1 terminal on the solenoid to the positive terminal on the key switch.
- Connect the speed controller: Attach a wire from the S2 terminal on the solenoid to the negative terminal on the speed controller.
If you have an ATV facing the same solenoid issue, check out this post on ATV Starter Solenoid Wiring Diagram.
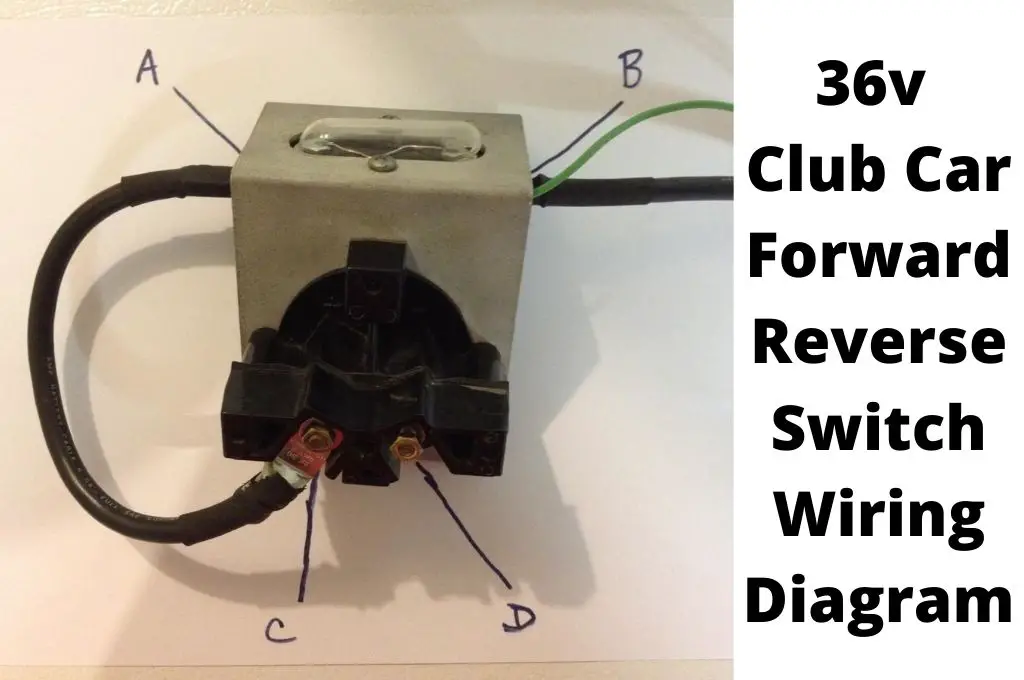
EZGO 36 Volt Solenoid Wiring Diagram
This is the EZGO 36 Volt Solenoid Wiring Diagram:
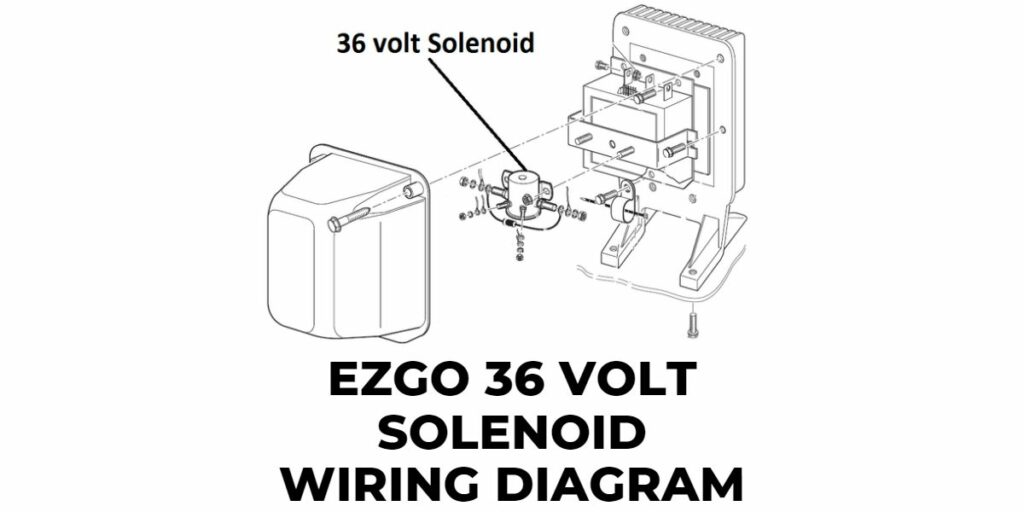
How to Wire a Solenoid on A 36 Volt EZGO Golf Cart
This is a step-by-step guide to wire a solenoid on a 36-volt EZGO golf cart:
- Connect the main positive battery terminal to one of the two large solenoid terminals.
- Connect the positive terminal of the cart’s controller to the other large solenoid terminal.
- Connect the negative terminal of the controller to one of the small solenoid terminals.
- Connect the potentiometer microswitch with 36v rating to the other small solenoid terminal.
If you’re keen on understanding more about the electrical system of your golf cart, make sure to check out our comprehensive guide on the EZGO Golf Cart Wiring Diagram.
EZGO 48v Solenoid Wiring Diagram
This is the EZGO 48 volt Solenoid Wiring Diagram:
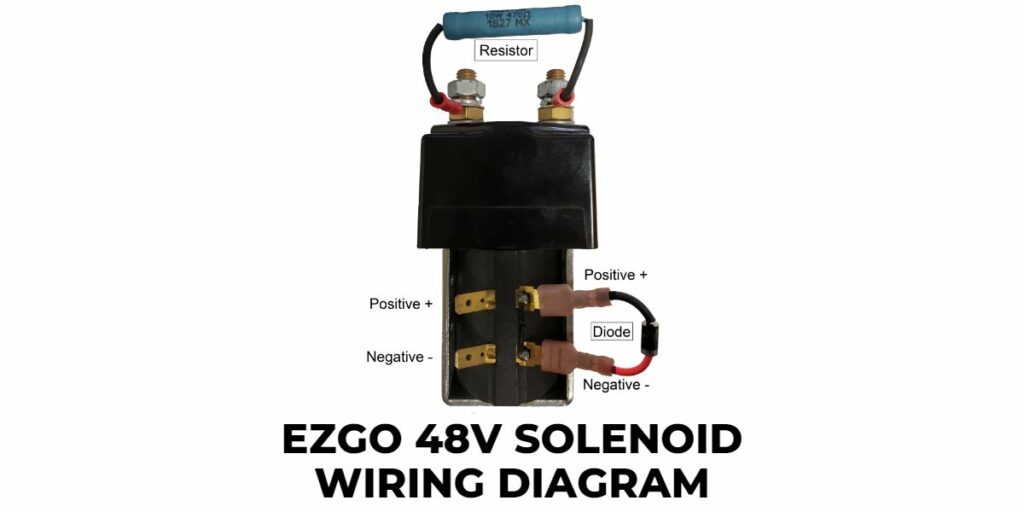
EZGO Gas Golf Cart Solenoid Wiring
This is the EZGO Gas Golf Cart Solenoid Wiring:
- Locate the solenoid: The solenoid is typically found under the seat of your golf cart, usually mounted near the speed controller.
- Identify the terminals: For a 4-terminal solenoid (which is most common in EZGO carts), you’ll have two large terminals and two small terminals.
- Connecting the battery to the solenoid: Connect a wire from the positive terminal of your battery to one of the large terminals on the solenoid.
- Connecting the solenoid to the starter generator: Connect a wire from the other large terminal on the solenoid to the A1 terminal on the starter generator.
- Connecting the ignition switch to the solenoid: Connect a wire from one of the small terminals on the solenoid to the positive terminal on the ignition switch. The other small terminal should be connected to the ground.
EZGO TXT Solenoid Wiring
This is the EZGO TXT Solenoid Wiring:
- Connecting the battery to the solenoid: Connect a wire from the positive terminal of your battery to one of the large terminals on the solenoid.
- Connecting the solenoid to the controller: Connect a wire from the other large terminal on the solenoid to the B+ terminal on the controller.
- Connecting the key switch and the controller to the solenoid: Connect a wire from one of the small terminals on the solenoid to the positive terminal on the key switch. The other small terminal should be connected to the negative terminal on the controller.
If you’re looking to further understand the components of your EZGO TXT golf cart and their placements, be sure to check out our comprehensive guide on the EZGO TXT Parts Diagram.
EZGO RXV Voltage Reducer Wiring
This is the EZGO RXV Voltage Reducer Wiring:
- Locate the voltage reducer: Typically, it’s installed near the battery compartment.
- Connect the reducer to the battery: Attach the red wire (positive) from the reducer to the positive terminal of the battery pack, and the black wire (negative) to the negative terminal of the battery pack.
- Connect the reducer to the accessories: The output wires from the reducer (often red and black as well) should be connected to the positive and negative terminals of the accessory switch or fuse panel.
Identifying Your EZGO Solenoid
Now that we know what a solenoid is, let’s make sure you’ve got the right one for your EZGO golf cart. There are two main types: the 4-terminal and the 6-terminal solenoids.
Most EZGO carts use a 4-terminal solenoid, but double-checking is always good.
Look for a label or markings on the solenoid to identify which type you have.
Conclusion
And there you have it! With a bit of patience and this easy-to-follow EZGO solenoid wiring diagram, you’ll be back on the green in no time. Remember, the key to success is taking your time, double-checking your connections, and staying safe throughout the process. Don’t be afraid to ask for help or consult a professional if you’re unsure or experiencing any difficulties.
Now that your solenoid is properly wired and your golf cart is running smoothly, you can enjoy the satisfaction of a job well done.
So, the next time someone needs assistance with their EZGO Solenoid Wiring Diagram, feel confident in sharing your knowledge and experience. After all, there’s nothing quite like the camaraderie and sense of accomplishment that comes from helping others tackle their golf cart challenges.
Happy wiring, and may your drives be long and your putts be short!
