Have you ever popped open the hood of your EZGO and felt utterly lost, especially when it comes to that elusive drive clutch?
I’ve been there.
Sometimes, words just aren’t enough and what you really need is a good, detailed diagram.
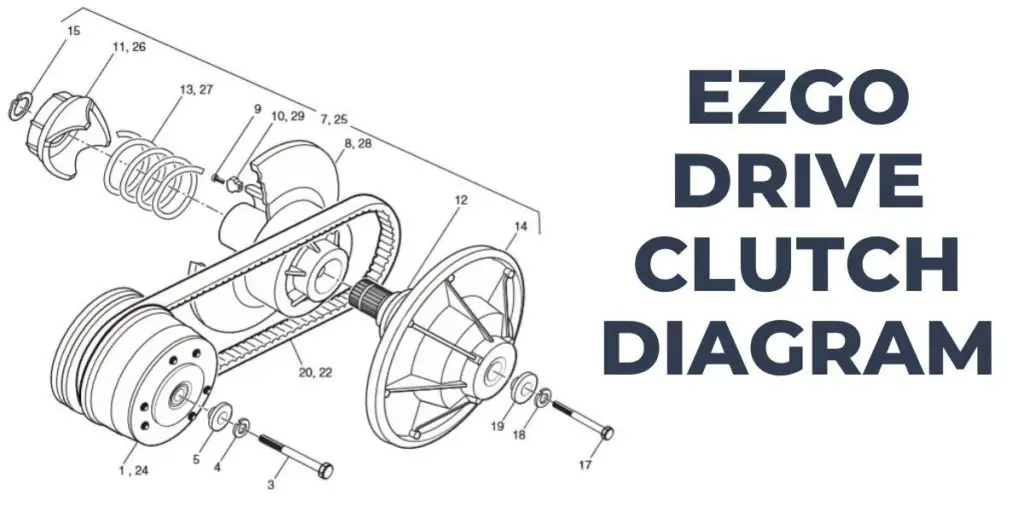
So, for all of us looking to get a bit more hands-on with our carts, I’ve put together an EZGO Drive Clutch Diagram to shed some light on the mystery.
EZGO Drive Clutch Diagram
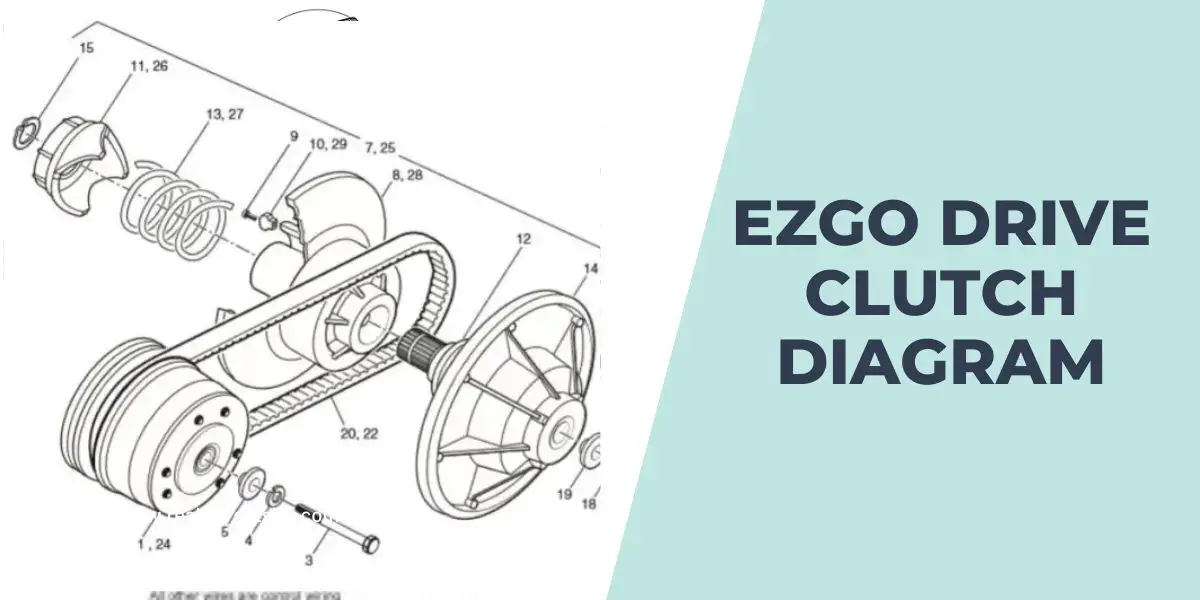
This is the diagram for EZGO drive clutch Diagram:

By the way, if you’re also curious about the inner workings of your EZGO golf cart carburetor, be sure to check out my detailed EZGO Golf Cart Carburetor Diagram.
Understanding EZGO Drive Clutch
The EZGO drive clutch serves as a vital link in the power transmission system of our beloved golf carts and utility vehicles. Its primary purpose is to engage and disengage the engine’s power to the wheels, allowing for smooth acceleration and efficient operation.
Without a properly functioning drive clutch, our rides would be a bumpy and underpowered affair. That’s why it’s crucial to grasp the fundamentals before delving into the intricate details of its design.
While exploring the EZGO drive clutch diagram, it’s worth noting that understanding the EZGO Golf Cart Wiring Diagram is equally crucial for a comprehensive grasp of the vehicle’s electrical system.
Components of The EZGO Drive Clutch Diagram
These are the components of the EZGO Drive Clutch Diagram:
- Primary Sheave: The primary sheave is a cone-shaped component connected to the engine crankshaft. Its adjustable design allows it to expand and contract, gripping the drive belt tightly. As engine RPM increases, the primary sheave expands, facilitating clutch engagement.
- Weights: The weights are small, movable components within the primary sheave. These weights respond to centrifugal force. As the engine revs up, the weights move outward, exerting pressure on the primary sheave and influencing the clutch engagement process.
- Drive Belt: The drive belt connects the primary sheave to the secondary sheave. It is crucial in transferring power from the engine to the wheels. The grip and tension of the drive belt impact the smoothness of acceleration and overall vehicle performance.
- Secondary Sheave: The secondary sheave is another adjustable cone-shaped component connected to the driven axle. It adjusts its width based on the speed of the vehicle. By adapting to different driving conditions, the secondary sheave ensures that the drive belt maintains proper tension, optimizing power delivery.
How to Troubleshoot Common Issues Using the EZGO Drive Clutch Diagram
Follow these steps to Troubleshoot Common Issues Using the EZGO Drive Clutch Diagram:
- Determine the specific issue you’re experiencing with your drive clutch. Whether it’s slipping, not engaging properly, or making unusual noises, pinpointing the problem will help you focus your troubleshooting efforts.
- Use the diagram to trace the power flow through the drive clutch system. Start from the engine and follow the path of the drive belt, noting each component it comes into contact with.
- Inspect the components visually, comparing them to the diagram. Look for signs of damage, excessive wear, or misalignment. Pay close attention to the drive belt condition, which is often a common culprit for clutch issues.
- Ensure that all parts are correctly aligned according to the diagram. Misalignment can lead to poor clutch performance. Adjust as necessary, following manufacturer guidelines.
- Evaluate the spring tension and weights on the drive clutch. Refer to the diagram to confirm if they are positioned correctly and if their condition is within the recommended specifications.
- Consult the owner’s manual or any resources that provide troubleshooting tips for EZGO drive clutches. Cross-reference the symptoms you’ve observed with the corresponding solutions provided.
Frequently Asked Questions
These are the frequently asked questions about the EZGO Drive Clutch Diagram:
What if I cannot resolve the issue using the EZGO drive clutch diagram?
If you cannot resolve the issue using the diagram and troubleshooting resources, it’s recommended to contact a certified technician or an authorized EZGO service center. They have the expertise and specialized tools to diagnose and address complex problems with the drive clutch system.
Are there any safety precautions to consider when working with the drive clutch system?
It is crucial to prioritize safety when working with the drive clutch system. Before attempting any maintenance or troubleshooting tasks, ensure the golf cart is turned off, and the parking brake is engaged. Avoid wearing loose clothing or accessories that could get caught in the moving parts.
Conclusion
Whether you’re a seasoned mechanic or an enthusiastic DIYer, having access to a comprehensive diagram empowers you to tackle maintenance and repairs confidently. So, next time you find yourself delving into the world of drive clutches, remember the valuable insights provided by this diagram. Happy wrenching!


