Troubleshooting electrical issues without a clear understanding of the wiring system can be frustrating.
However, as a retired engineer that has worked with EZGO Marathon golf cart carts in the past, I will share my insights on locating and understanding it.
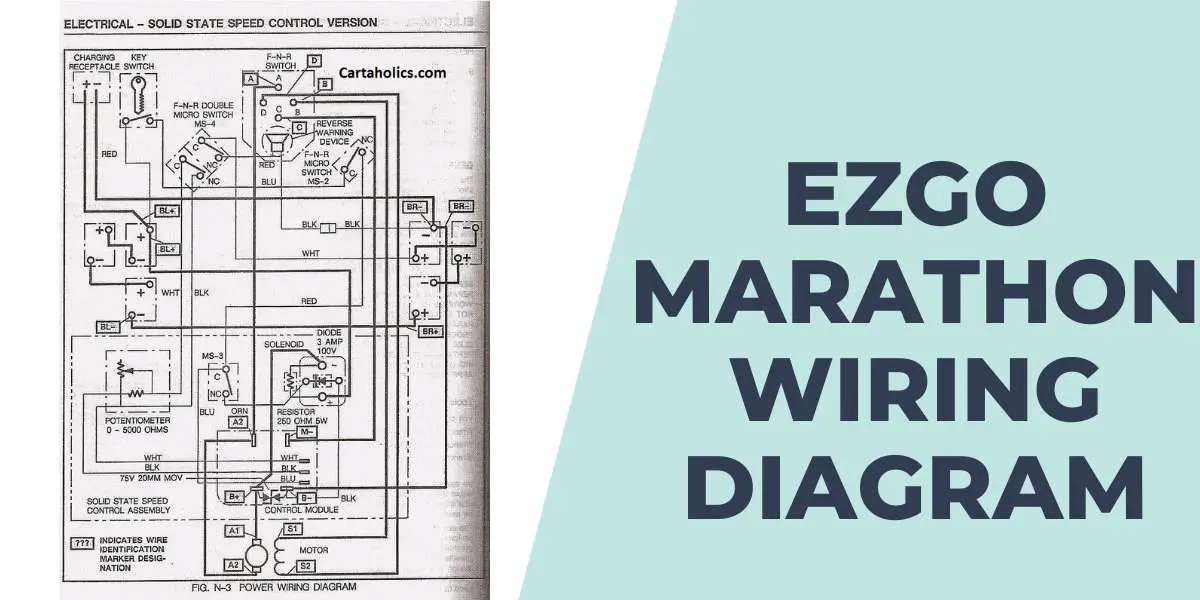
Let’s get started as I guide you through the EZGO Marathon Wiring Diagram, decoding the symbols and color codes, and troubleshooting common electrical problems.
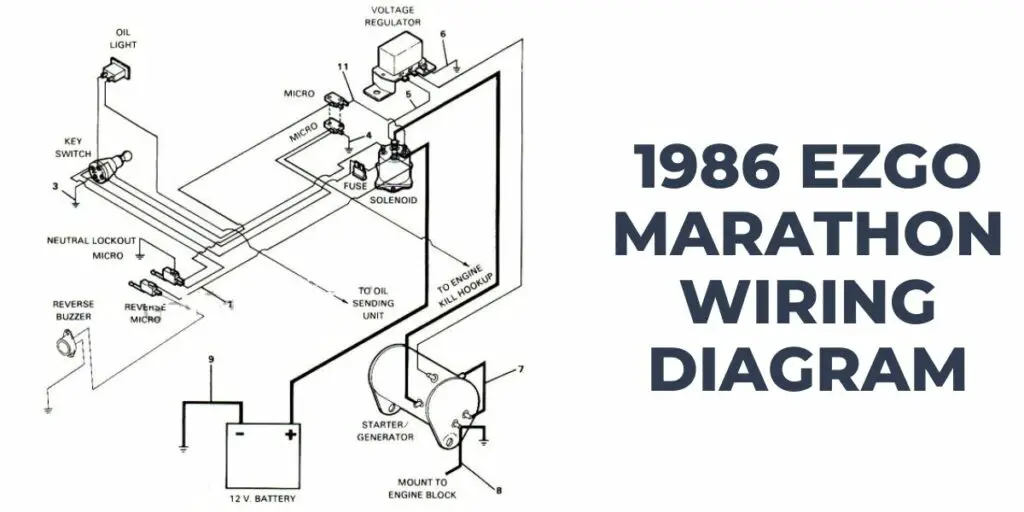
1986 EZGO Marathon Wiring Diagram
This is the 1990 EZGO wiring diagram:
EZGO’s TXT is also a popular model these days. Check out the EZGO TXT Parts Diagram to learn the similarities between the two.
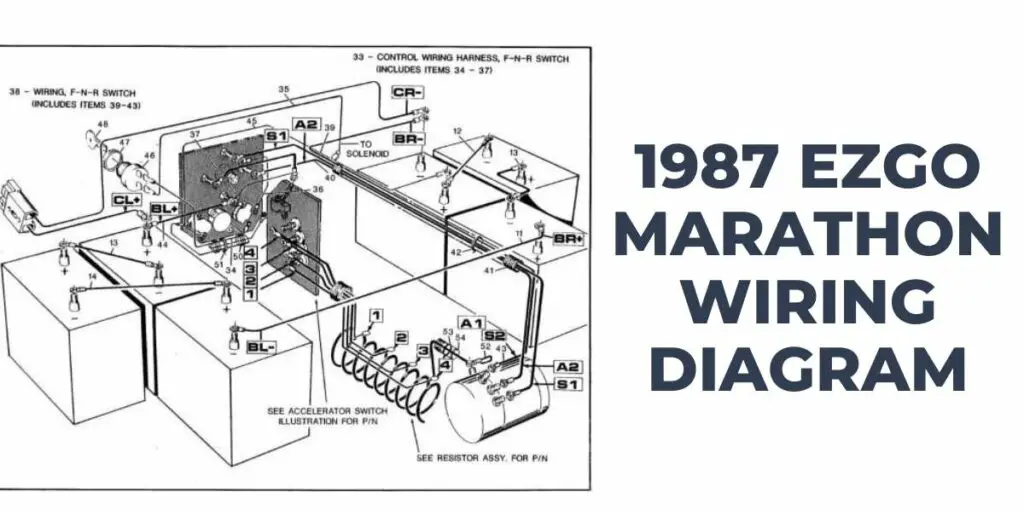
1987 EZGO Marathon Wiring Diagram
This is the 1987 EZGO marathon wiring diagram:
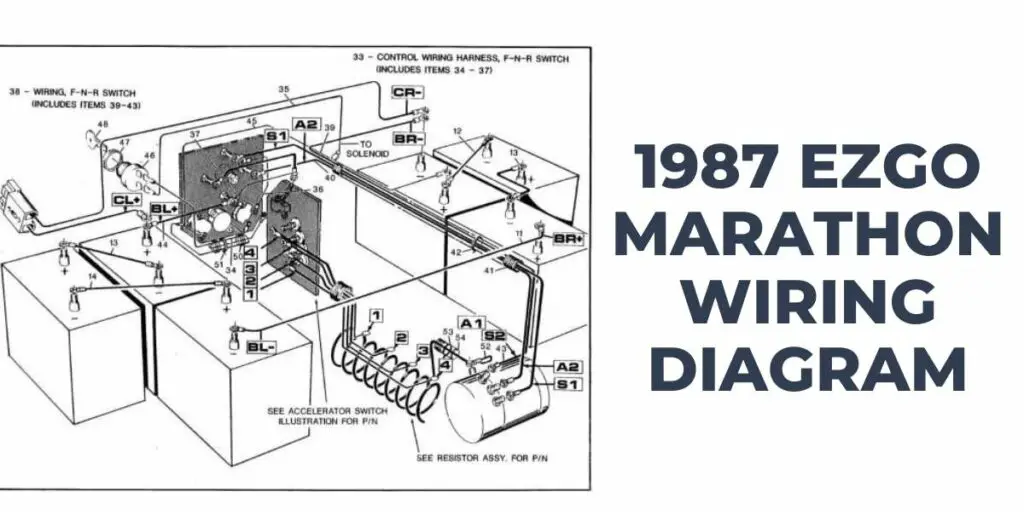
1989 EZGO Marathon Wiring Diagram
This is the 1989 EZGO marathon wiring diagram:
For more detailed information on identifying and understanding your EZGO golf cart’s specifics, check out our comprehensive EZGO Serial Number Lookup guide.
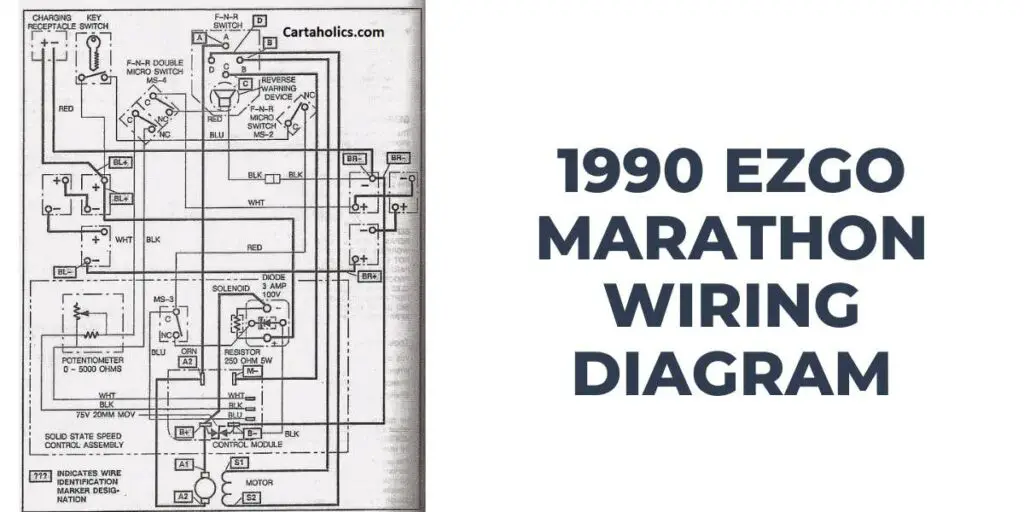
1990 EZGO Marathon Wiring Diagram
This is the 1990 EZGO marathon wiring diagram
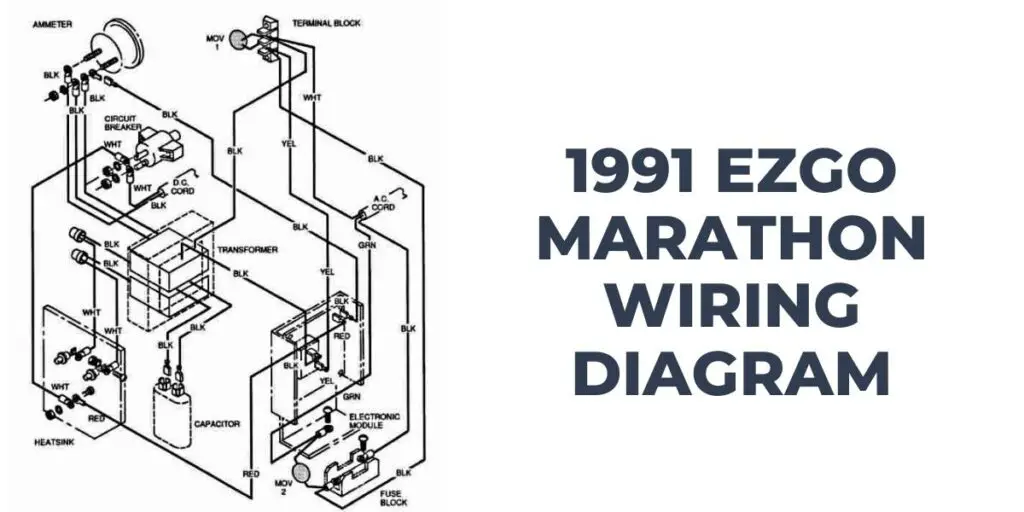
1991 EZGO Marathon Wiring Diagram
This is the 1991 EZGO wiring diagram:
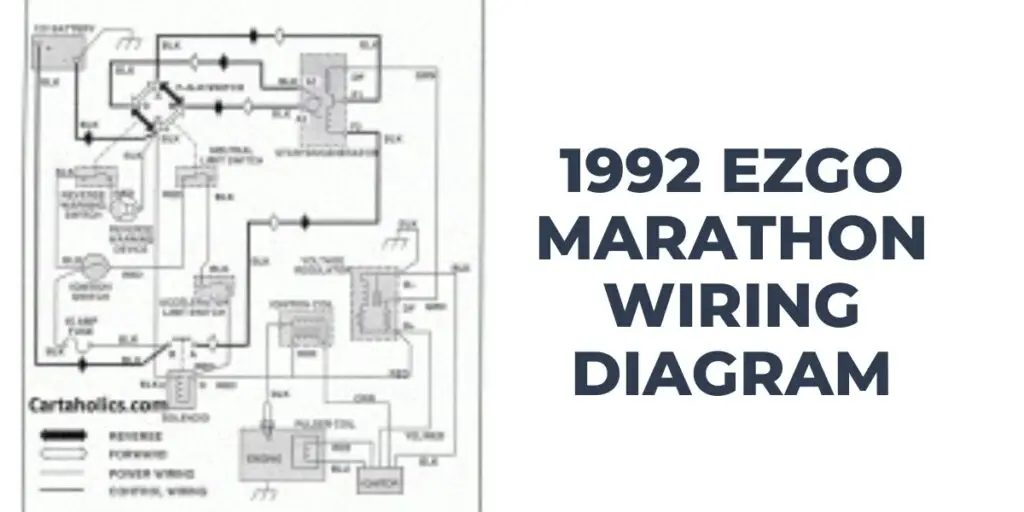
1992 EZGO Marathon Wiring Diagram
This is the 1992 EZGO wiring diagram:
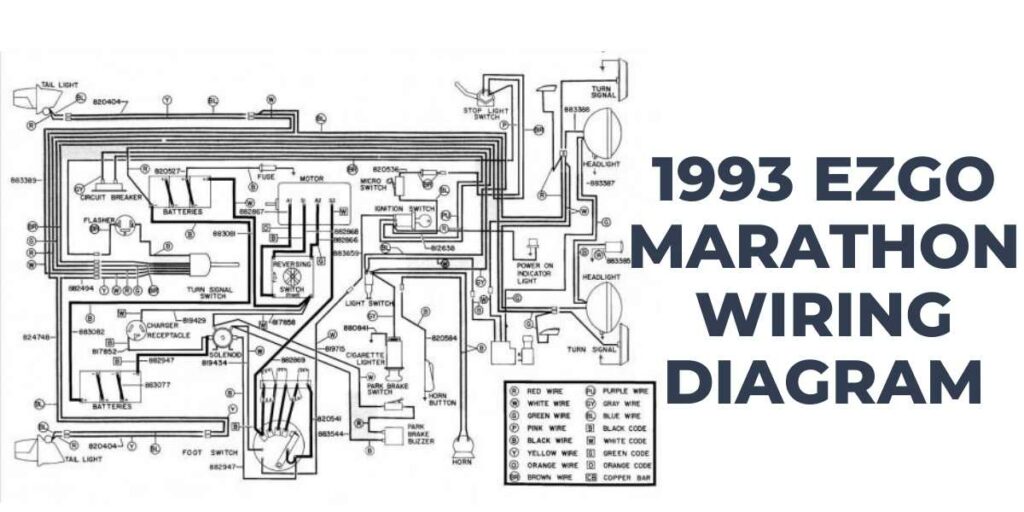
1993 EZGO Marathon Wiring Diagram
This is the 1993 EZGO wiring diagram:
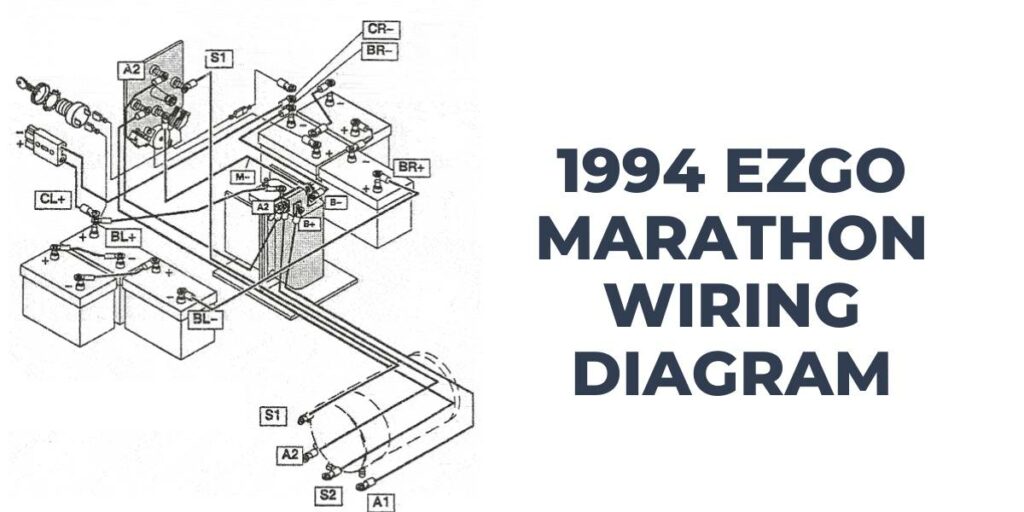
1994 EZGO Marathon Wiring Diagram
This is the 1994 EZGO wiring diagram:
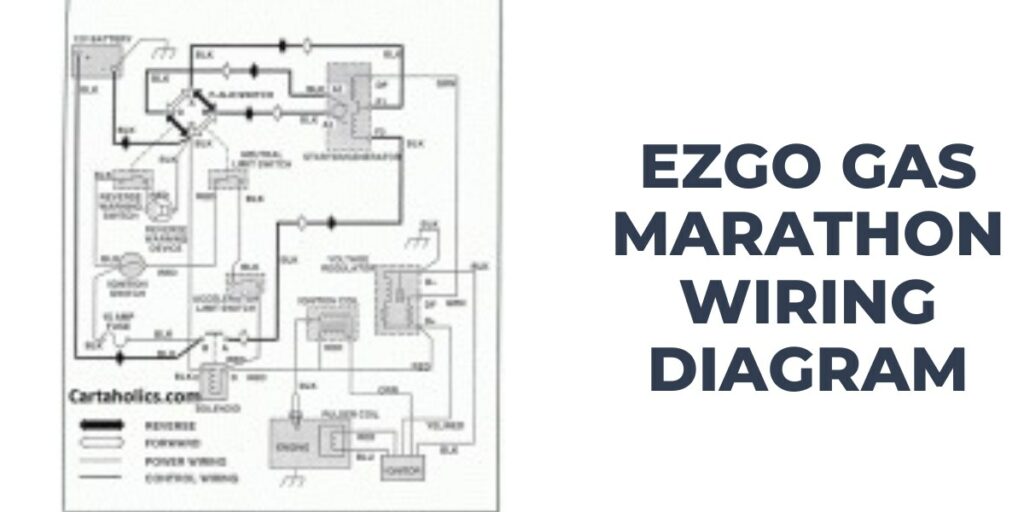
EZGO Gas Marathon Wiring Diagram
This is the EZGO gas marathon wiring diagram:
For a deeper dive into the wiring diagram specific to EZGO starter generators, especially as a beginner, head to my EZGO Starter Generator Wiring Diagram post to learn more.
What Is the Purpose of the EZGO Marathon Wiring Diagram?
The purpose of this wiring diagram is to provide a visual guide to help technicians and mechanics understand the wiring system and troubleshoot any issues that may arise.
The wiring diagram shows the various components of the electrical system, including the battery, solenoid, controller, motor, and various switches and sensors.
It also shows the wiring connections between these components, including the color-coded wires and the type of connection used, such as spade connectors or ring terminals.
The diagram provides a clear understanding of how the various components of the electrical system work together, allowing for efficient and effective troubleshooting and repair.
Using the EZGO Marathon Wiring Diagram, technicians can quickly diagnose and repair electrical problems with the golf cart.
If you’re also looking for a wiring diagram for a gas-powered Club Car, be sure to check out my post on Club Car Wiring Diagram Gas for more helpful tips and insights.
How to Read EZGO Marathon Wiring Diagram
Follow these steps to read the EZGO Marathon Wiring Diagram:
- Understand the symbols: The diagram will use various symbols to represent different components such as batteries, motors, solenoids, controllers, switches, and wires. Take the time to familiarize yourself with these symbols, so you can easily identify the various components.
- Identify the power source: The diagram will usually show a battery or batteries as the power source. Find this on the diagram, and follow the power lines to see how the power is distributed throughout the system.
- Identify the ground: The diagram will usually show a symbol for the ground, often a horizontal line with several vertical lines branching off. Find this on the diagram, and follow the ground lines to see how the ground is connected to the various components.
- Follow the wiring: The diagram will show how wires connect the various components. Look for the color-coded lines and follow them to see how the components are connected.
- Understand the connections: The diagram will show the type of connection used between components, such as spade connectors or ring terminals. This will help you understand how to troubleshoot any issues with connections.
- Read the key: The diagram will usually have a key or legend that explains the symbols used on the diagram. Take the time to read this key and understand what each symbol represents.
Overall, understanding an EZGO Marathon Wiring Diagram requires a little patience and practice. By following the tips above and taking the time to study the diagram, you can develop a solid understanding of how the golf cart’s electrical system works.
EZGO Marathon Wiring Diagram Overview
This is the EZGO Marathon Wiring Diagram Overview:
- Main Wiring Harness: This is the main wiring harness that connects all the other cart components.
- Battery Cables: These cables connect the batteries to the rest of the cart.
- Solenoid: The solenoid is an electrical switch used to connect and disconnect the battery from the motor. This is what allows the cart to start and stop.
- Key Switch: The key switch is used to turn the cart on and off.
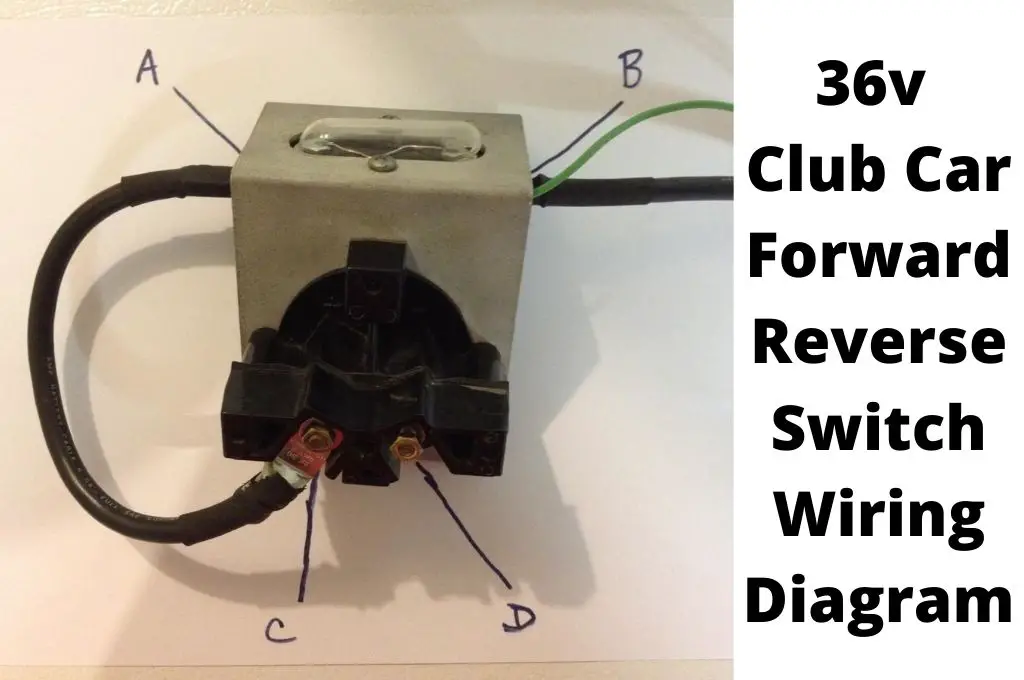
- Forward/Reverse Switch: This switch is used to control the direction of the cart. It allows the cart to move forward or backward.
- Accelerator Pedal: The accelerator pedal controls the cart’s speed. When the pedal is pressed, the motor speeds up, and when it is released, the motor slows down.
- Motor: The motor is what drives the cart. It converts the electrical energy from the batteries into mechanical energy to move the wheels.
- Charger: The charger is used to recharge the batteries.
The wiring diagram will typically show the connections between these components and how they are connected to the main wiring harness. It will also show the color codes of the wires used for each connection. It is important to have a wiring diagram when working on any electrical system to ensure that the connections are made correctly and to prevent damage to the system or injury to the person working on it.
FAQs on EZGO Marathon Wiring Diagram
These are the frequently asked questions on the EZGO Marathon Wiring Diagram:
What is the purpose of the EZGO Marathon Wiring Diagram?
The purpose of an EZGO Marathon wiring diagram is to provide a visual representation of the electrical connections and wiring layout for the golf cart. This can help troubleshoot electrical problems and aid in the installation of new electrical components.
Why do I need to know about the EZGO Marathon Wiring Diagram?
As an EZGO Marathon owner, understanding the wiring diagram will help you troubleshoot and repair any electrical issues that may arise. It can also help you with customizing your golf cart’s electrical system.
Conclusion
In conclusion, the EZGO Marathon Wiring Diagram is essential for anyone looking to wire and troubleshoot their EZGO Marathon golf cart properly. It provides a comprehensive layout of the wiring system, including the connections between the various components, such as the batteries, solenoid, motor, and controller.
By referring to the wiring diagram, users can ensure that their golf cart is wired correctly, which can help prevent electrical issues and extend the life of their cart. Furthermore, the diagram can be used to diagnose and repair any electrical problems.
Overall, the EZGO Marathon Wiring Diagram is a valuable resource that can make maintaining and repairing your golf cart easier and more efficient.
